Using the Compliance Script Policy
Learn about using the Compliance Script Policy to select content for analysis and perform the analysis, using a query builder.
For information about using policies in the context of the Community Manager developer portal, see Business Policies.
Table of Contents
- About the Compliance Script policy
- Creating a Compliance Script policy
- Configuring a Compliance Script policy
- Compliance Script policy options
- Populating a Compliance Script policy with schema or WSDL data
- Populating a Compliance Script with service data
- Populating a Compliance Script with exchange (message) data
- Activating a policy
- Attaching a policy
About the Compliance Script policy
The Compliance Script Policy uses a combination of XQuery and Java to first select the content for analysis and then to perform the analysis.
The first sections of the policy definition allow you to identify the content on which the script will be run. The next step is to define the script that will be run on the content.
Creating a Compliance Script policy
The first step in creating a policy is to define the basic policy information.
To add a compliance policy
- Go to Workbench > Browse > Organization, and select Policies > Compliance Policies. The Policies Summary is displayed.
- Click Add Policy.
- Choose the policy type and click Next.
- Specify a name (required) and description (optional) and click Finish. At the Completion Summary, click Close. The Add Policy Wizard creates a draft policy instance that you can then configure on the Policy Details page.
For more information, see Add Policy.
Configuring a Compliance Script policy
Once you've created the policy, you can configure the policy options.
You can define a script rule to evaluate exchange, schema, service, or WSDL asset types by defining namespace declaration, an XQuery statement, and a script.
To configure a Compliance Script policy
- Go to Workbench > Browse > Organization and select the Policies > Compliance Policies folder. The Policies Summary is displayed.
- Find the policy on the list and click to go to the pane for the Compliance Script policy.
- In the second section, click Modify. The Modify Script Policy page opens, as shown below.
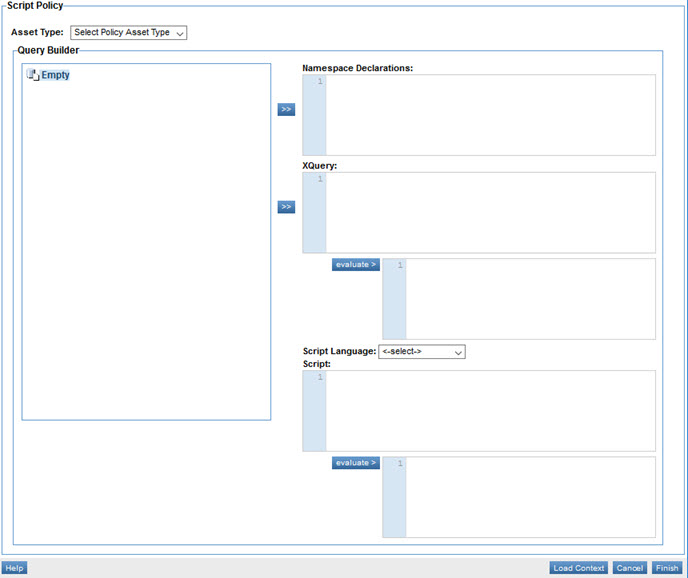
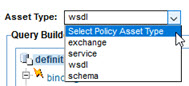
- Choose the asset type, as shown below. Valid asset types: exchange, service, WSDL, or Schema.
- Click Load Context, and then specify the details of the asset. The process flow is different for each asset type; for details, follow the applicable link in Asset Type below.
- Specify values for the policy as needed. For information on the individual options, see Compliance Script Policy Options below.
- Choose a script language, and define a script.
- Save the policy definition.
That completes the policy configuration. You can now assign the policy to a service.
Compliance Script policy options
The Modify Compliance Script Policy wizard includes the options listed below.
- Asset Type
- Choose from the list of supported asset types that can be evaluated by the current rule definition, and then click Load Context to upload the file associated with the asset type (for example, a WSDL file). Asset type choices:
- schema
For instructions, see Populating a Script policy with schema or WSDL data below.
- service
For instructions, see Populating a Script policy with service data below.
- exchange (that is, message)
For instructions, see Populating a Script policy with exchange (message) data below.
- wsdl
For instructions, see Populating a Script policy with schema or WSDL data below.
- Tree Hierarchy
- The tree hierarchy stores the asset information that you specify for the current policy definition. You can populate it with any one of the four asset types (message, schema, service, and WSDL). When you choose the asset type, define the source, and click Load Context, the tree hierarchy is populated with the content.
- After the tree hierarchy is populated, you can select Namespace Declarations and XPath expressions and transfer them to the target text boxes (Namespace Declarations and XQuery) by clicking the arrow buttons.
- Load Context
- Once you've specified the asset type, click the Load Context button to populate the tree hierarchy of the Query Builder with data to use in defining your Compliance Script policy. The applicable screen is displayed, depending on the asset type:
- Exchange—Displays the Select Usage Log screen which allows you to specify a usage log to upload into the tree hierarchy of the Query Builder.
- Schema—Displays the Upload File screen which allows you to upload a schema into the tree hierarchy of the Query Builder.
- Service—Displays the Upload Service screen which allows you to navigate a tree hierarchy and select a service to be uploaded into the tree hierarchy of the Query Builder.
- WSDL—Displays the Upload File screen which allows you to upload a WSDL into the tree hierarchy of the Query Builder.
- Namespace Declaration
- You must specify the namespace declaration for the XQuery statement. All namespace declarations are separated by a semi colon (;) and are of the form:
declare namespace compCtx='http://www.akana.com/2007/Compliance-Context';
- This provides namespace prefix resolution for the XQuery statement, effectively decoupling the XQuery statement from literal namespace prefixes.
- XQuery
- The XQuery text box must contain the comp context (compCtx:) for the selected asset.
- Evaluate (XQuery statement)
- Evaluates the XQuery statement against the current context and displays the results in the associated text box.
- The XQuery statement must evaluate as follows:
- A Boolean result of true for a passed rule
- A Boolean result of false for a failed rule
- An integer value of 0 for a passed condition
- 1 to denote a warning
- 2 to denote an error
- Script Language
- A drop-down list box that allows you to select a script language to apply to the configuration. Supported script languages:
- Jython
- JavaScript
- Beanshell Engine (http://www.beanshell.org)
- Script
- The script is defined using a scripting language to evaluate the XQuery result and return a result.
- Evaluate (Script)
- The evaluate button evaluates the script against the current context and displays the results in the associated text box.
- Note that the Query Builder implementation is for advanced users and requires a working knowledge of XPath / XQuery.
- The script statement must evaluate as follows:
- A Boolean result of true for a passed rule
- A Boolean result of false for a failed rule
- An integer value of 0 for a passed condition
- 1 to denote a warning
- 2 to denote an error
Populating a Compliance Script policy with schema or WSDL data
To populate a Compliance Script policy with schema or WSDL data, you'll need to upload the applicable file. From the Asset Type list, select schema or wsdl, and then click Load Context. The Upload File page is displayed, as shown below.
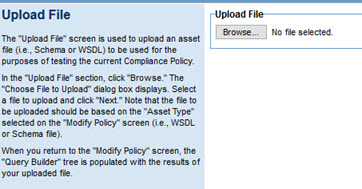
Upload the asset file (schema or WSDL) to be used for testing the current Compliance Policy. Make sure you upload the correct file type, according to the asset type you specified.
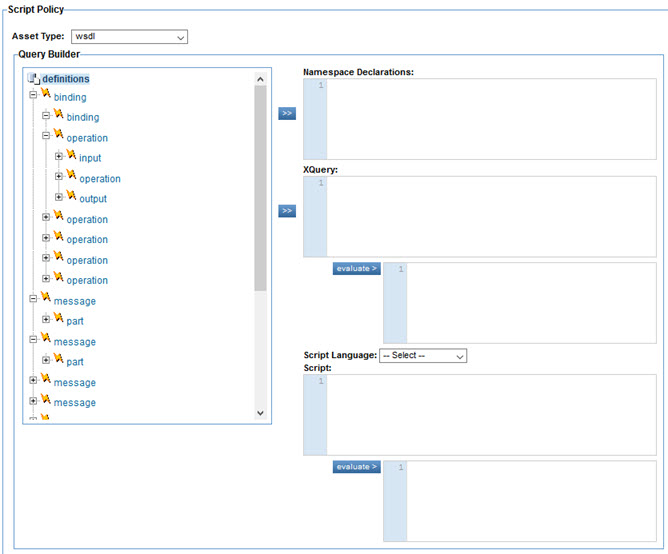
The Query Builder tree is populated with the file you uploaded. An example is shown below, with some of the nodes in the left pane expanded.
Populating a Compliance Script policy with service data
To populate a Compliance Script policy with service data, choose an Asset Type of service and then click Load Context.
The Select Policy Asset page is displayed, as shown below.
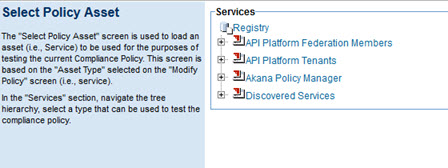
Here, you can upload an asset file (Service) to be used for testing the Compliance Policy.
Navigate the tree hierarchy, choose a service, and click Next. You are returned to the Modify Policy page, and the service information is displayed in the Query Builder tree, as shown below.
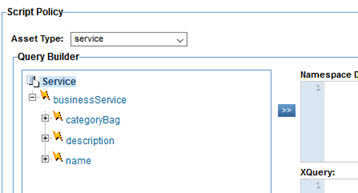
You can now configure the policy further based on the service you selected, following the steps in To configure a Compliance Script policy (Step 6 onwards).
Populating a Compliance Script policy with exchange (message) data
To populate the policy with message data, choose Exchange from the Asset Type list, and then click Load Context. The Select Usage Log screen is displayed.
On this page, you can filter usage data, as shown below.
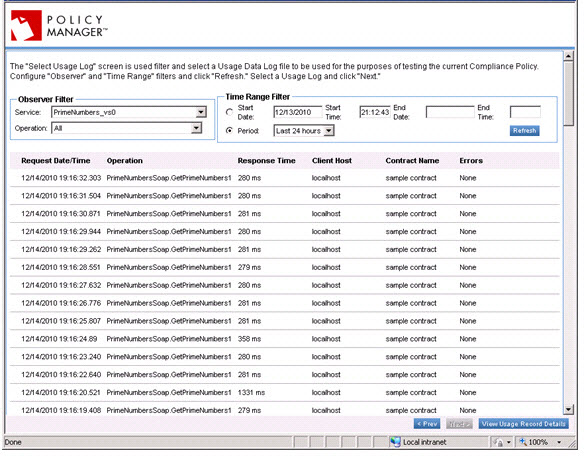
Choose a service/operation combination and specify a time range filter. Configure the Observer Filter and Time Range Filter and then click Refresh.
After completing the search, choose the usage logs you would like to use to populate the Query Builder, and then click Next.
To view details for selected usage records, select a usage data report line item and click View Usage Record Details. The Usage Record Details screen displays with a list of usage data fields and associated SOAP messages.
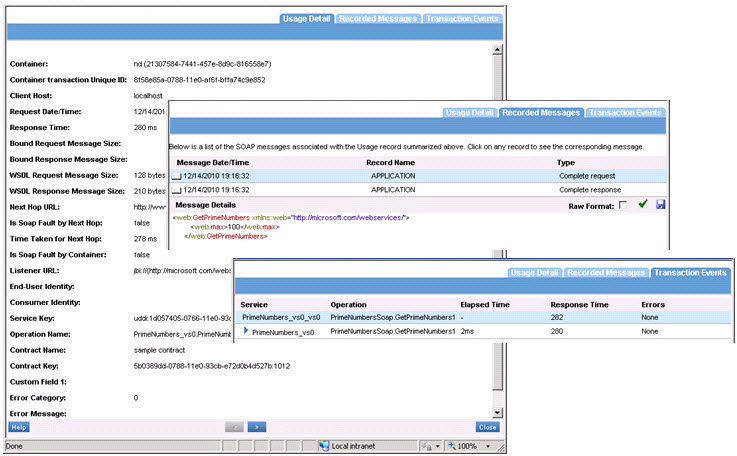
Usage Record Details page
This page includes the following:
- Usage Detail
- The Usage Detail tab allows you to navigate the list of SOAP messages associated with the current usage record. To navigate to the next SOAP message, click Next or Previous.
- Recorded Messages
- The Recorded Message section displays SOAP messages associated with the usage record of the current service. To view the message details for the current SOAP message, just click the line item. To view message details in XML format, choose Raw Format. To save the selected SOAP message, click Save.
- Transaction Events
- The Transaction Events section displays a list of transactions associated with the selected service. Each line item includes the following:
- Service
- Operation
- Elapsed Time
- Response Time
- Errors
To view the usage detail for a transaction, just double-click the line item. An example is shown below. The example below combines the display of all three tabs.
To exit, click Close.
Activating a policy
When you create and configure a policy, the policy is in Draft state. When the policy configuration is complete, activate the policy: click Activate Policy and then confirm. See Activate a Policy.
A policy in Draft state is not available for general use. Once you activate the policy, it is in Active state and is available for use.
Attaching a policy
To use the policy, go to the Policies folder in the respective organization and attach the policy to a web service, binding, or binding operation.


