Managing User Accounts
Manage user accounts for platform users, including adding, activating, disabling, and deleting accounts. These are Site Admin activities.
Table of Contents
- Who can manage user accounts?
- How do I manage user accounts in the platform?
- What actions can I perform on user accounts?
- What are the components of the List of Users page?
- How do I add a user?
- How do I activate a user account?
- How do I edit a user account?
- How do I change the email address for a user?
- How do I unlock a user account?
- How do I lock a user account?
- How do I disable a user account?
- How do I enable a user account that's been disabled?
- How do I delete a user account?
- What user account status displays for Administrator invitations?
- How do I search for a user account?
- Why don't I see many items when I view the user's Forum?
- How do I exclude specific roles from platform access?
- How can I protect from vulnerability in Signup and Forgot Password scenarios?
- What are the user roles for notifications sent out from the platform?
- How do I implement two-factor authentication for platform users?
- How do I collect the telephone number for platform users in the user interface?
- I want to add a custom workflow action for users - what do I do?
Who can manage user accounts?
Only a Site Admin for the Community Manager developer portal can access the More > Admin >Users page and manage user accounts.
Only a Site Administrator for the Akana Administration Console can configure the user role setting, which denies access to users with certain roles. For more information, see What actions can I perform on user accounts?
How do I manage user accounts in the platform?
There are two ways to manage platform access:
- Exclude specific roles from access: this is controlled by a setting in the Akana Administration Console and requires installation of an add-on, Akana Scheduled Jobs. For more information, see How do I exclude specific roles from platform access?
- Manage individual user accounts: the Site Admin can manage user accounts on the platform via More > Admin >Users, on the List of Users page. This page provides a summary listing of user account details, statistics about each user's activity on the platform, and actions that a Site Admin can take on a user account. See What actions can I perform on user accounts?
What actions can I perform on user accounts?
On the List of Users, the Site Admin can perform the following actions on user accounts:
- Add a user: see How do I add a user?
- Activate: see How do I activate a user account?
- Edit: see How do I edit a user account?
- Disable: see How do I disable a user account?
- Enable: see How do I enable a user account that's been disabled?
- Delete: see How do I delete a user account?
- Unlock a locked account: see How do I unlock a user account?
- Lock: see How do I lock a user account?
Valid actions for a specific user account are determined by the account's current status, as shown in the table below.
| If an account has this status... | The site admin can perform these actions... |
|---|---|
| pending_validation | Activate or Delete |
| Registered | Disable/Enable, Lock/Unlock, or Delete |
| Invited | Delete |
When the Site Admin clicks through to a specific user account, additional actions are available on the left menu. By using these options the Site Admin can do the following:
- Details: View details about the user's account, such as name, email, profile name, and change certain values.
- Forum: View items on the user's Forum. You cannot make any changes; this option is for information only. For more information, see Why don't I see many items when I view the user's Forum?
- Password: Change the user's password.
- Security: View the user's security challenge information.
- Settings: View or change the user's notification settings.
For instructions about making changes, where applicable, see How do I edit a user account?
What are the components of the List of Users page?
The Administration section includes a Users page that allows you to manage site users. This page includes all users who have signed up to the platform, even if registration is not complete.
Some general points about this page:
- To sort by the information in a specific column, in ascending or descending order, click the column title once or twice.
- Search is available on the users list. To reset the search, click the Clear Search button.
The following table provides a description of each page element.
| Field | Definition |
|---|---|
| Total Users | Displays the total number of site users. |
| Name / Email | Displays the username and email address associated with a user account. The username is clickable, providing a link to view or edit the user's profile information. For more information, see How do I edit a user account? |
| Status | Displays the current status of a user account. Possible values: pending_validation, registered, or invited. |
| Last Login | The date and time the user last logged on. |
| APIs | The number of APIs the user is the Administrator of. |
| Apps | The number of apps for which the user is on the app development team |
| Groups | The number of groups the user is a member of. |
| Posts | The number of posts the user has added to the Action Dashboard, App Forum, or API Forum. |
| Actions | A drop-down menu displaying actions that are currently valid for a specific user account. Possible values: Activate, Disable, Enable, or Delete. |
| Add User | A button that allows the Site Admin to add a user. |
How do I add a user?
The Site Admin can add a new user to the platform by providing first name, last name, and email address. An email notification is sent to the user with login instructions, and a temporary password is generated and issued to the Site Admin.
The Site Admin must securely convey the password to the user.
To log in, the user must have the temporary password and must choose a new password. The user might also need to complete other steps such as accepting the platform legal agreement and providing answers to security challenge questions.
If you add a user, you can set up the user workflow so that when the user logs in for the first time a notification is sent to Site Admins and also to API Admins for any APIs the user is associated with (for example, if the user was automatically added to an app team via custom workflow, any APIs the app is associated with).
To add a user
- Log in as a Site Admin.
- Go to More > Admin >Users.
- On the Users page, click Add User.
- On the Add User page, provide the following information:
- First name
- Last name
- Email address
- Conditional, depending on platform settings: Country code and phone number
- Password. You can specify a password, or leave the Password/Confirm Password fields empty and the platform auto-generates a password.
- Specify whether the user will be forced to change the password when logging in for the first time. The default behavior is to force the user to change from the default password.
- Click Save.
- At the notification message, copy the user's temporary password to a secure location, and then click OK.
- Convey the password securely to the user, who will also receive an email notification with login instructions.
How do I activate a user account?
When a new user signs up for the platform, the user account is automatically added to the platform and displays on the Users page with a pending_validation status. The user registration process can be completed in two ways:
- By the user clicking the link in the notification email and completing the registration process.
- By the Site Admin activating the account (see below).
To activate a user account
- Log in as a Site Admin.
- Go to More > Admin >Users.
- On the Users page, find the user account you want to activate.
- On the Action drop-down at the right, click Activate.
- At the notification message, click OK. The account status is immediately updated. Note that although the status change is immediate, there is a short delay before the information on the list is updated.
How do I edit a user account?
The Site Admin can edit any of the values that are part of the profile for a specific platform user.
To edit a user account
- Log in as a Site Admin.
- Go to More > Admin >Users.
- On the List of Users page, find the user account that you want to change. Use the Search tools if needed.
- Click the link on the username to access the user's profile.
- Click the link on the username to access the user's profile. You can edit values in any of these user profile pages:
- Details: firstname, lastname, profile name, email address (see How do I change the email address for a user? below), avatar
- Password. You can also check the box to force the user to change the password at next login.
- Security (security questions and answers, if required)
- Settings
- Save changes.
How do I change the email address for a user?
The platform identifies each user by the email address and password, which are linked to the user's unique UserID in the platform database.
Because the email address is a primary identifier, special security measures are in place around a change of email address. When the user changes his/her own email address, notifications are sent to both new and old accounts, and a code is sent to the new account. The user must enter the code in the Community Manager developer portal user interface to confirm the change.
When the Site Admin initiates the change on behalf of a user, notifications are also sent to both new and old accounts. in this scenario, the user must also change the password on the account. Changing the password confirms the change.
If you initiate the change of email address on behalf of a user, it is your responsibility to authenticate the individual making the request, to make sure you are not inadvertently giving someone else access to a user account.
Notes:
- The Site Admin can initiate an email address change for another user but not for himself/herself.
Security limitation: The Site Admin cannot edit the email address for another Site Admin or Business Admin.
- If the user logs in with a third-party account such as a Google, Okta, or Facebook account, the email address set up in the Community Manager developer portal must match the address in the provider account. If you change the email address on the User Settings page, make sure the user knows that the same change must be made in the third-party provider account.
To initiate change of email address for another site user
- Log in as a Site Admin.
- Go to More > Admin >Users.
- On the List of Users page, find the user account that you want to change. Use the Search tools if needed.
- Click the link on the username to access the user's profile, Details page.
- Next to the current user email, click Change.
- In the popup box, type the new email address and click Next.
Note: If the user is a Site Admin or Business Admin, you cannot initiate change of email address.
- You'll see an alert that a notification has been sent to the user, as shown in the example below. Click OK.
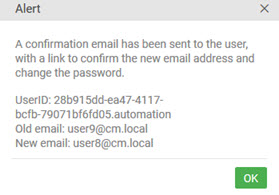
The platform sends the following email notifications:
- To the new email address: with a link for the user to change password and confirm the email change.
- To the old email address: as a courtesy message to help prevent possible account hijacking.
If the Site Admin changes the user email address, changing the password is a requirement.
How do I unlock a user account?
Platform settings control whether a user gets locked out of an account if the wrong password is entered multiple times, and also control how long the user is locked out for.
The Site Admin can manually unlock a specific user account via the Users List. Follow the steps below.
To unlock a user account
- Log in as a Site Admin.
- Go to More > Admin >Users.
- On the Users page, find the user account that's locked.
- From the Actions drop-down menu on the right, choose Unlock.
There is a delay before the page is updated, but the change is immediate and the user can log in.
How do I lock a user account?
If needed, you can lock a user account. For example, you might need to do this if an account is compromised. The action takes effect immediately and the user will not be able to log in. If the user remembers the answers to the security challenge questions, the user can click the "forgot password" link and change the password. Changing the password unlocks the account.
Notes:
- When an account is locked by the Site Admin, the account lock period defined in the platform settings does not apply; the account remains locked until the Site Admin unlocks it.
- You can only lock a user account if the user is on the local domain; that is, the user has created an account on the Community Manager developer portal and is logged in using that account. You can't lock users logging in with another domain, such as a Google or Facebook domain. For these users, the Lock option is not available from the Actions drop-down menu.
To lock a user account
- Log in as a Site Admin.
- Go to More > Admin >Users.
- On the Users page, find the user account that you want to lock.
- From the Actions drop-down menu on the right, choose Lock, as shown below.

There is a delay before the page is updated, but the change is immediate and the user can no longer log in.
How do I disable a user account?
The Site Admin can change the status of a user account. An account must have a status of Registered before it can be disabled.
If you disable a user account, the user trying to log in will see an error message that the account has been disabled.
Note: When you select an account action it is applied immediately to the account, but it may take up to five minutes to refresh the status in the UI.
To disable a user account
- Log in as a Site Admin.
- Go to More > Admin >Users.
- On the Users page, find the user account you would like to disable.
- From the Actions drop-down menu on the right, choose Disable.
- At the notification message, click OK. The account status is immediately updated. Note that although the status change is immediate, there is a short delay before the information on the list is updated.
How do I enable a user account that's been disabled?
The Site Admin can change the status of a user account. You can enable an account if it has a status of Registered and is currently disabled.
Note: When you select an account action it is applied immediately to the account, but it may take up to five minutes to refresh the status in the UI.
To enable a user account that's been disabled
- Log in as a Site Admin.
- Go to More > Admin >Users.
- On the Users page, find the user account you would like to enable.
- From the drop-down menu on the right, select Enable.
- At the notification message, click OK. The account status is immediately updated. Note that although the status change is immediate, there is a short delay before the information on the list is updated.
How do I delete a user account?
When a user account is deleted, the account is removed from the platform along with associated apps, APIs, posts or other artifacts.
To delete a user account
- Log in as a Site Admin.
- Go to More > Admin >Users.
- On the Users page, find the user account you would like to delete.
- From the drop-down menu on the right, select Delete.
- At the notification message, click OK. The account status is immediately updated. Note that although the status change is immediate, there is a short delay before the information on the list is updated.
What user account status displays for Administrator invitations?
An existing user who has received an invitation to become a platform administrator is assigned a status of invited. After the user has accepted the invitation, the status changes to registered.
How do I search for a user account?
The Search Users text box allows you to perform a full-text search to target user accounts in the platform. Searchable entities include any data that displays in the List of Users page columns.
To perform a search in the List of Users page
- Log in as a Site Admin.
- Go to More > Admin >Users.
- In the List of Users page, in the search box at the top right, enter search criteria and then click GO.
- Choose from the search results.
Why don't I see many items when I view the user's Forum?
As the Site Admin, you can view a user's Forum as it appears to the user: Go to More > Admin >Users > click through on a specific user > Forum on left menu bar).
A user might have many apps and API contracts but yet not have many Forum items. This is because most Forum items post only to the Forum of the resource they are applicable to, such as an app or API Forum.
For information on what types of items post to which Boards, see What types of items show up on which Forums? (general user help).
Because Forum item types are long-lived, and the permissions of an individual user might change, Forum items relating to apps and APIs are not posted to the user's individual Forum. The user can see those items by visiting the Forum of apps or APIs for which he/she has visibility.
On a user's Forum you might see:
- Tickets written by the specific user if it doesn't relate to a specific app
- Group membership invitations
How do I exclude specific roles from platform access?
You can exclude all users with a specific role or roles from accessing the platform, by installing an add-on and then setting values for a configuration property in the Akana Administration Console.
To exclude specific roles from platform access
- Log in to the Akana Administration Console and install the Akana Scheduled Jobs feature. For instructions, refer to the Akana Administration Console help.
- In the Admin Console, go to Configuration > Settings.
- In the Configuration Categories on the left, choose com.soa.atmosphere.
- In the right pane, find this property: atmosphere.config.userRolesDenied.
- Set one or more values, using comma separators as needed (additional info re valid values below). You can use Akana API Platform or Policy Manager roles, as shown below:
Site Administrator,Business Administrator, ApiAdmin, BusinessAdmin, SiteAdmin
- Click Apply Changes.
Valid roles for the atmosphere.config.userRolesDenied property are as follows:
- Akana API Platform roles: SiteAdmin, BusinessAdmin, and ApiAdmin
- Policy Manager roles: Log in to the Policy Manager console and then choose Workbench. On the left, select your organization, and then on the right, click the Security tab to view information about valid roles.
How can I protect from vulnerability in Signup and Forgot Password scenarios?
If you're concerned with security, there is an extra step you can take to protect from a vulnerability in the Signup and Forgot Password scenarios that could allow a malicious user to enumerate user accounts.
There is a configuration setting that you can modify to restrict user enumeration in these scenarios:
- Password reset
- New account setup
The database field is ALLOW_USER_ENUM, in the BUSINESS_SECURITY_SETTINGS table. If enabled (set to com.soa.feature.enabled, or no value specified) the default behavior is in effect. If this value is set to com.soa.feature.disabled, the enhanced security behavior is activated.
You can modify this field in the user interface in the business security configuration settings: see How do I configure settings for business security?
The table below shows the default platform behavior and the enhanced security behavior for these two activities.
| Activity | Default Behavior | Enhanced Security Behavior |
|---|---|---|
| Password Reset request, account does not exist: local user | User sees message that the email address/password reset combination is invalid. |
|
| Password Reset request: non-local (third-party) User | User sees message that the email address is registered with third-party identity provider and therefore the password cannot be modified within the platform. |
|
| Password Reset request: valid existing user account | User sees message that the email was sent. | User sees message that the email was sent. |
| Password Reset request: Invalid email address/password reset code combination | User sees message: Email address does not match record. | User sees message: Invalid email address/password reset code combination. |
| Create Account, account already exists with the specified email address: Local User | User sees message that the email address is already in use. |
|
| Create Account, account already exists with the specified email address: Third-Party User | User sees message that the email address is already in use. |
|
| Create Account, account with the provided email address does not exist | Signup process proceeds as expected. | Signup process proceeds as expected. |
What are the user roles for notifications sent out from the platform?
By default, the platform sends out email notifications to keep users informed about events of significance to a specific user; for example, membership changes to groups the user is a member of, or changes to an app or API the user is connected to.
Users can customize their preferences for email notifications: see How do I enable or disable email notifications?
In a scenario where the platform implementation includes more than one theme, the Site Admin can run a database script to customize the platform URL used for notifications to specific user roles: see How do I configure separate notification addresses for different platform themes?
The table below shows the default roles to which notifications are sent. This is not a full list of notifications, but shows general notification types.
| This role... | Receives these types of notifications... |
|---|---|
| Anonymous User | Signup invitation |
| API Admin | Anything relating to the API, including team membership changes, tickets, posts, reviews, and contract requests or other API access changes. |
| App Admin | Anything relating to the app, including team membership changes, tickets, posts, reviews, and contract requests or other API access changes. |
| Business Admin | Anything relating to the Business Admin team. |
| Developer | Team invitations, API access requests and cancellation. |
| Invited User | An invitation to the team, or removal notification, for that specific user. |
| Member | Anything relating to an independent group on the platform. |
| Site Admin | Anything relating to the Site Admin team. |
| User | Anything relating to a specific logged-in user, such as posts, reviews, tickets, and notifications relating to the user's account such as password reset. |
How do I implement two-factor authentication for platform users?
You can add a second layer of user security by implementing two-factor authentication, so that as well as logging in with credentials, the platform provides a one-time code that's dynamically generated and sent to the user, and the user then enters that code as part of the login process.
The platform supports two-factor authentication by the use of an out-of-the-box platform workflow, and by generating a code that's sent to the user.
The workflow supports sending the code to the user by email. Custom workflow could be implemented to send the code by voice or text, and to offer the user the option to choose how the code is delivered. The workflow does not support the additional functionality to send verification codes by voice or text; this would be an out of band process.
2FA is available for:
- Users who have created an account on the platform
- LDAP users
By default, the two-factor authentication feature is turned off. However, the platform out-of-the-box installation includes a user workflow that you can use to implement this functionality. The workflow name is: workflow:definition:user:v2.
This user workflow, default-user-workflow-v2.xml, guides the user through entering a verification code after normal login is complete. The verification code, passed to the user in an out-of-band process, completes the login process.
To log in, the user must provide normal credentials and then also enter the two-factor verification code.
The workflow retrieves values set up for two-factor authentication in a platform Settings page. For information on the Settings page, see How do I configure settings for two-factor authentication of users (2FA)?
How do I collect the telephone number for platform users in the user interface?
You can modify the user interface so that pages that collect user information also include a telephone number field. These pages are:
- User profile page: Profile > Details.
- The page where the Site Admin adds a user: More > Admin >Users > Add.
If the telephone number field is present, a field for the telephone country code is also present, and both are required fields.
To enable these fields in the platform user interface, you must first load the country codes that you want to support, in the database.
The database table name is TENANT_COUNTRY_CODES.
Once you've done that, the telephone number field automatically appears on applicable user pages.
I want to add a custom workflow action for users - what do I do?
The platform's user workflow can be extended with additional functions to add or modify the capabilities of the user interface by means of a custom workflow.
If you add custom actions that users can perform, they will be available on the user profile page (Profile > Details). If you add custom actions that a Site Admin can perform on a specific user, they will be available from the User Details page that the Site Admin sees: More > Admin >Users > click through on a specific user.
For example, you could implement a custom workflow that provides the full set of capabilities for self-sign users and a restricted set of capabilities for users added by the Site Admin (or vice versa). You could then manage the capabilities of these two basic user groups via custom workflow; for example, users added by the Site Admin can add both apps and APIs and self-sign users can only add apps. You could implement functionality so that the Site Admin can click through to the Details page for a specific user and switch that user between the two groups. This is an example of a custom workflow action that's available only to the Site Admin, who can perform this custom workflow action from the User Details page: More > Admin >Users > click through on a specific user.
The example below illustrates the above scenario, as an example of custom functionality that you could enable via custom workflow.
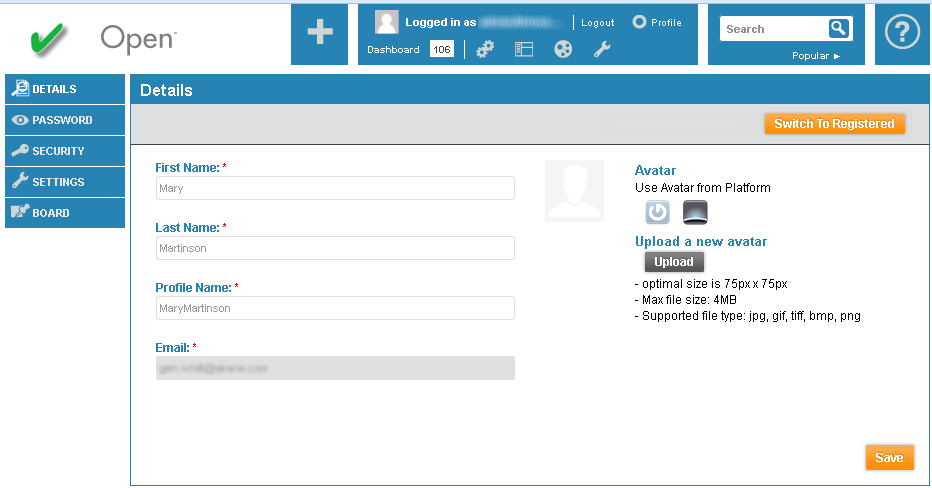
Up to two custom workflow actions are displayed as buttons, as shown above. If there are more than two, they are displayed in a drop-down list.
If you want to implement custom workflow actions, and need assistance, contact Technical Support for additional information. You can also check the workflow documentation to check which custom functions are available: see Custom Workflows in the Community Manager developer portal.


