Using Configuration Actions
Learn about configuration actions available in the Admin Console.
Note: This document references the version of the Admin Console that is the default up to and including version 2022.1.0, but does not show the redesigned Admin Console available as an option in version 2022.1.0. For an overview of the new user interface, plus illustrations, see Admin Console 2022.1.0—Overview.
Table of Contents
- Introduction
- Default Configuration Actions
- Policy Manager Configuration Actions
- Configuration Actions
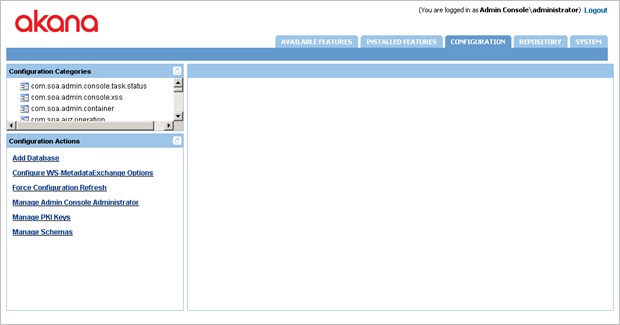
- Add Database
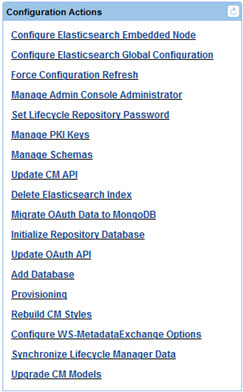
- Configure Elasticsearch Global Configuration
- Configure Envision Time Zone (Envision only)
- Configure Kafka Brokers for Auditing
- Configure LDAP Authentication Domain (Envision only)
- Configure MongoDB Database (Envision only)
- Configure Sample Datasets (Envision only)
- Configure WS-MetadataExchange Options
- Force Configuration Refresh
- Initialize Repository Database
- Install Configuration Data and Indexes in MongoDB
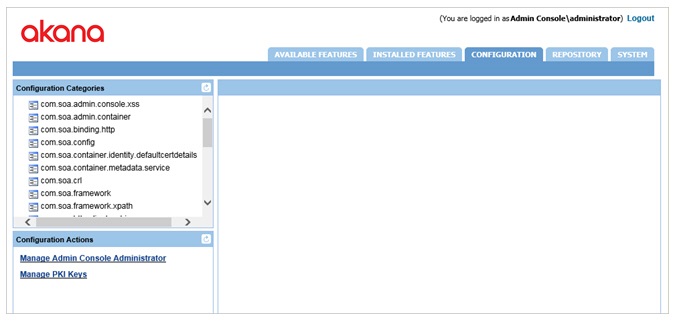
- Manage Admin Console Administrator
- Manage PKI Keys
- Manage Schemas
- Migrate OAuth Data to MongoDB
- Provisioning
- Rebuild CM Styles
- Set Lifecycle Repository Password
- Set Topology API Credentials
- Synchronize Lifecycle Manager Data
- Update CM API
- Update OAuth API
- Upgrade CM Models
- Upgrade Database Objects to 8.2 Model (when Akana PM 8.2 Upgrade tool is installed)
- Upgrade Database Objects to 8.4 Model (when Akana 8.2 to 8.4 model upgrade tool is installed)
- Upgrade Policies and Contracts (when Akana PM 7.2 Upgrade tool is installed)
- Upgrade SLA policies and Service Document Descriptors (when Akana PM 8.0 Upgrade tool is installed)
Introduction
This topic provides a summary of the configuration actions available in the Admin Console (Configuration > Configuration Actions).
Some of these actions are required as part of installation and/or upgrade; some are actions that you might run in specific circumstances, as explained below.
Some of the configuration actions are only available if a specific product is installed. See notes for specific configuration actions.
Default Installation Configuration Actions
At minimum, a container instance includes the following default configuration actions:
For information on these tasks, refer to:
Policy Manager Configuration Actions
The following configuration actions are added to the Configuration Actions list as part of the Policy Manager Services feature installation.
For information on these tasks, refer to:
- Add Database
- Configure WS-MetadataExchange Options
- Force Configuration Refresh
- Manage Admin Console Administrator (default action)
- Manage PKI Keys (default action)
- Manage Schemas
Configuration Actions
Note: Additional options appear depending on additional features that might be installed, such as Envision. The detailed list in this document is alphabetical.
Add Database
The Add Database configuration option is available:
- During Policy Manager installation: As part of the initial configuration process for the Policy Manager Services feature, you'll see the Configure Database Options Wizard > Select Database Option page.
- In the Admin Console for the container, on the Configuration Actions list.
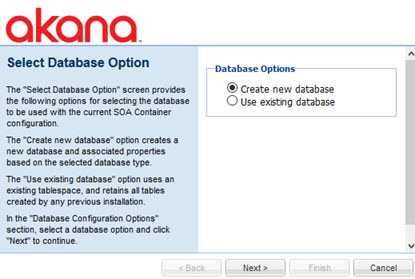
Use this action to perform the following actions:
- Create new database—Creates a new Policy Manager database and associated properties based on the selected database type.
For Oracle, choose Oracle Service Name (not SID). See Use Oracle Service Name, not SID (database notes, installation documentation).
Note: If you're using Oracle 18c or later, it's important that you create the database first, and then, in the Configure Database Options wizard, choose the Use Existing Database option (see Database creation, Oracle 18c or later).
- Use existing database—Uses an existing Policy Manager tablespace, and retains all tables created by any previous installation.
Manually Installed Schemas
If the database and schemas have been manually installed, or you're setting up a subsequent container in the same installation, or upgrading, choose Use existing database. When the Manage Schemas Wizard displays, the schemas that were manually installed are displayed in the Installed Schemas section. To complete the configuration, click Finish.
Database Configuration Options
In the Database Options section, select a database option and click Next to continue. A summary of property information is presented below for the Create new database and Use existing database options.
Select the database type and complete the database configuration.
| Option Name | Content |
|---|---|
| Database Details |
Database Type—Select the database type:
Name—The database name. |
| Administrator Details |
Admin Username—The username for the database administrator. Admin Password—The password for the database administrator. Note: You must supply the username and password of a user with sufficient privileges to create a new tablespace, such as a DBA. |
| Database Properties | |
| MS SQL Server |
Hostname—The name or IP address of the computer that is hosting the database. Default entry = {computer_name}. Port—Enter a port number. Port 1433 is the default port assigned in a standard SQL Server installation. Named Instance—Use this if you've set up separate SQL Server databases and would like to use a specific instance to store Policy Manager data. Database—The name for the database. For simplicity, it's best to use a short, clear name with no special characters. Username—Username for database access. Password—Password for database access. Note: If you are using MSSQL, you'll need to configure an additional quartz trigger property after you configure the database. |
| MySQL |
Hostname—Enter the name or IP address of the computer that is hosting the database. Default entry = {computer_name}. Port—Enter a port number. Port 3306 is the default port assigned in a standard SQL Server installation. Database—The name for the database. For simplicity, it's best to use a short, clear name with no special characters. Username—Username for database access. Password—Password for database access. |
| Oracle SID |
Instead of entering Oracle SID, choose Oracle Service Name. |
| Oracle Service Name |
Username—Username for database access. Password—Password for database access. Hostname—Enter the name or IP address of the computer that is hosting the database. Default entry = {computer_name}. Port—Enter a port number. Port 1521 is the default port assigned in a standard Oracle installation. Service Name—Enter an instance alias. Tablespace—Enter a valid name for the new tablespace. |
| Pool Configuration |
Choose from the pool configuration values below. Default values represent those used for a typical configuration.
|
For an example of how this task fits into the installation process, see Installation wizard: Add Database (installation doc for version 2020.2.x).
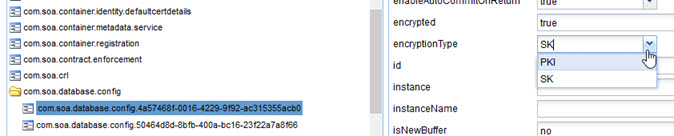
Database Password Encryption
Two database connection properties, encryptValues and encryptionMethod, work together to define how the database connection password is encrypted.
The rules are as follows:
- If the encryptValues property is defined and set to false, the password is stored as plain text. This property is not added by default. If you want to use this mode, you must add the property. However, since this leaves the database password unencrypted in the configuration file, this option is not recommended.
- If the encryptValues property does not exist, the default value is true.
- if the encryptValues property is true (either not defined, in which case the default is true, or defined with a value of true) the encryptionType field is used. There are two possible values for this field:
- PKI
- SK
- If the encryptValues property is true and the encryptionType field is PKI: the password field is very long. The value is the RSA-encrypted value of the plain text password, encrypted with the container identity public key. A side-effect of this option is that if someone changes the container identity certificate, the database password field must be changed even when the database connection password did not change. To find the encrypted value of the database password, run the encryptContainerData script located in the scripts folder. Run this script to find the encrypted password, copy the encrypted password into the Admin Console to the field for the database password, and save.
- If the encryptValues property is true and the encryptionType is SK, this means that a proprietary algorithm is in use for encrypting the database password without using the container identity certificate. The encryption used is TripleDES, with a random key peppered with an internal seed. The advantage of this option is that if the container identity certificate changes, but there is no change to the database connection password, you don't need to change the database configuration. This option uses a password to save the encrypted password and also uses a passwordHash to save the hash of the password. The disadvantage is that there is no way to retrieve the encrypted value and hash of the password. In this scenario, you could change encryptionType to PKI. Another option is to change encryptValues to false, but that is not secure. Another option is to delete the database connection and create a new one using the new password.
Configure Elasticsearch Global Configuration
You must install and configure Elasticsearch for the Community Manager developer portal. For full instructions, see Installing and Configuring Elasticsearch.
As part of installation or upgrade, you'll need to configure a couple of global settings. For instructions, see How do I configure Elasticsearch?
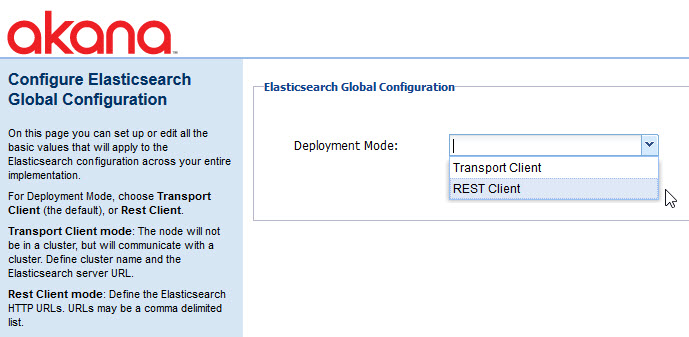
For more information about Elasticsearch, see Installing and Configuring Elasticsearch.
Configure Envision Time Zone (Envision only)
The Configure Envision Time Zone task runs the Configure Envision Global Time Zone Wizard, as shown below.

For information about this configuration action, refer to the Envision installation doc: Installing Envision Versions 1.2 and later: Configuration Action: Configure Envision Time Zone.
Configure Kafka Brokers for Auditing
The Configure Kafka Brokers for Auditing task runs the Configure Kafka Brokers for Auditing wizard, as shown below. This allows you to add a Kafka Broker configuration for usage monitoring.
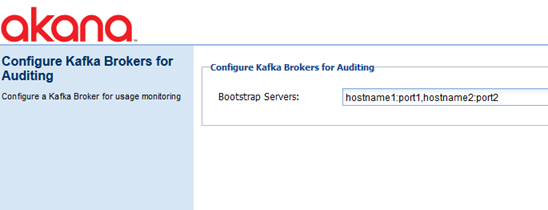
Only available when Kafka-related features are installed.
For more information about Kafka, see Using Kafka.
Configure LDAP Authentication Domain (Envision only)
The Configure LDAP Authentication Domain task runs the Configure LDAP Authentication Domain Wizard, as shown below.
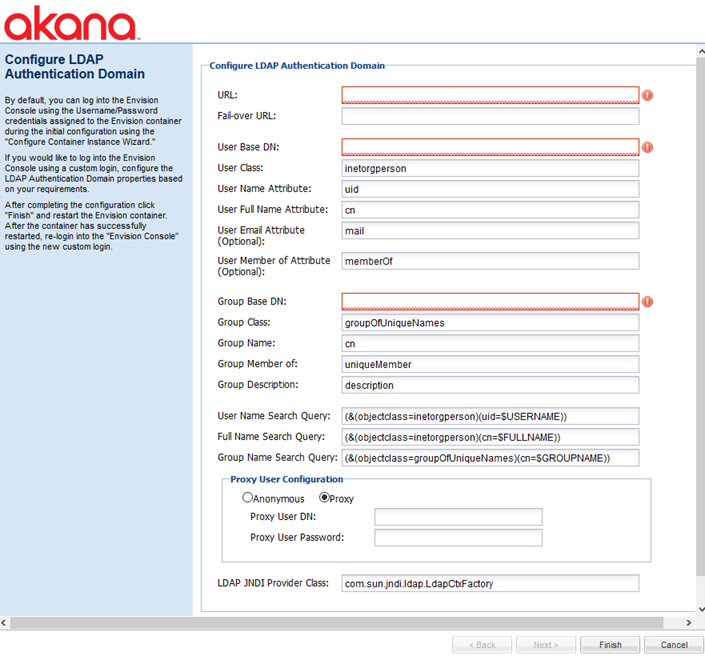
For information about using this wizard, see LDAP Authentication Domain (Envision doc).
Configure MongoDB Database Wizard (Envision only)
The Configure MongoDB Database task runs the Configure MongoDB Database Wizard, as shown below.
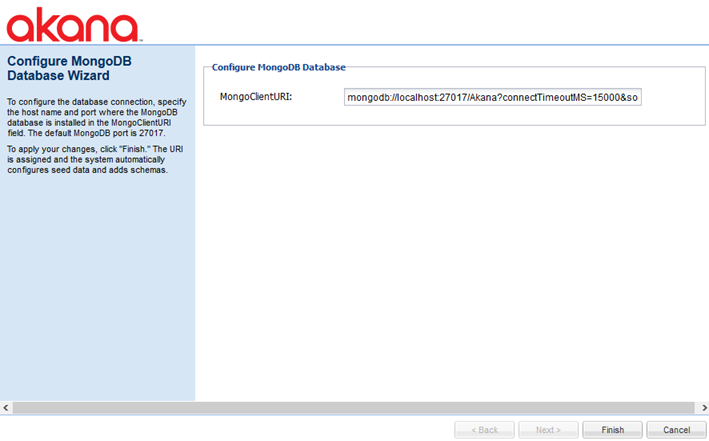
For information about using this wizard, see Step 5: Install Envision Console Extensions Plug-in (Envision doc).
Configure Sample Datasets (Envision only)
This task takes you to the Configure Sample Datasets page, where you can configure sample datasets for Envision.
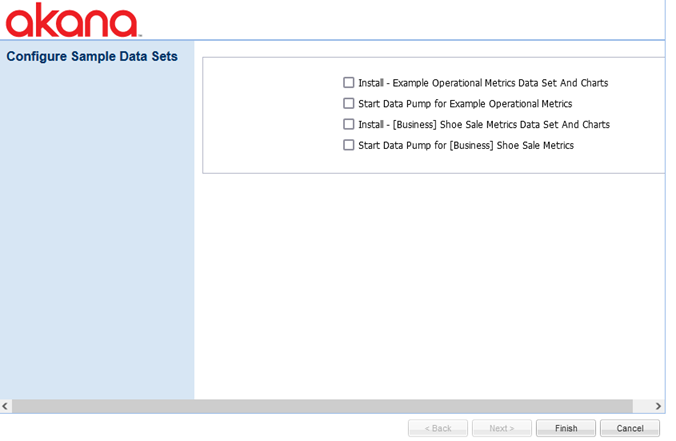
For more information about Envision, see Using Envision - Content Overview.
Configure WS-MetadataExchange Options
Connecting to the Metadata Exchange Service enables communication between the current Akana container instance and Policy Manager, to retrieve key information such as service hosting and database details).
The WS-MetadataExchange Options task allows you specify the URL of the Policy Manager Metadata Exchange Service.
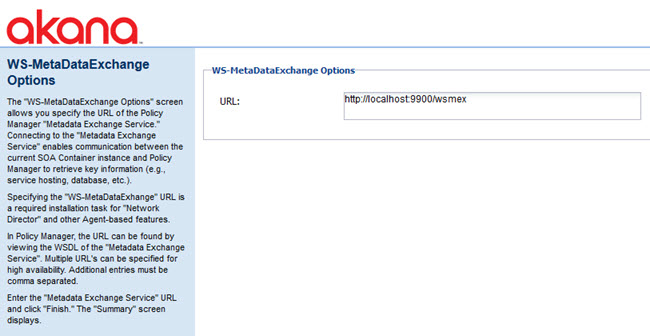
Specifying the WS-MetadataExchange URL is a required installation task for configuring Network Director.
In Policy Manager, you can find the URL by looking at the Service Descriptor Document of the Metadata Exchange Service. For high availability, you can specify multiple URLs, with a comma separator.
For an example of how this task fits into the installation process, see Installation wizard, ND container: Configure WS-Metadata Exchange Options (installation doc for version 2020.2.x).
Force Configuration Refresh
The Force Configuration Refresh task forces the container to reconfigure itself with configuration information from Policy Manager. Normally, the container polls periodically for configuration changes. However, if you feel that a configuration change was not updated by the container, or that the polling interval is longer than is desired to pick up a needed configuration change, you can use this task to force the reconfiguration update.
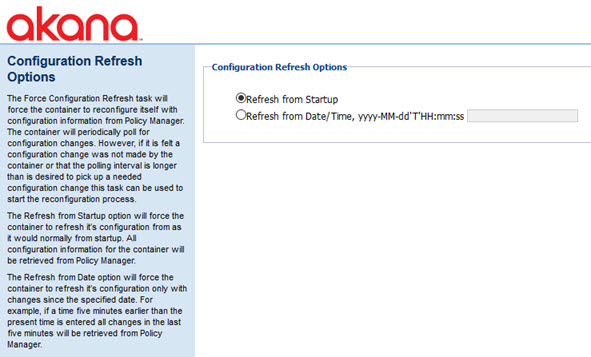
Two options are available:
- Refresh from Startup—Forces the container to refresh its configuration, as it would normally from startup. All configuration information for the container is retrieved from Policy Manager.
- Refresh from Date—Forces the container to refresh its configuration only with changes since the specified date/time. For example, if a time five minutes earlier than the present time is entered, all changes in the last five minutes are retrieved from Policy Manager.
Initialize Repository Database
This configuration action is useful in a scenario where an Akana API Platform install is using features that require Lifecycle Manager functionality, such as custom properties (requires download and install of a separate ZIP file) or API promotion.
Both these features require download and install of a separate ZIP file, and installation of the Lifecycle Manager extension.
Note: For Akana API Platform installs using the Lifecycle Repository feature, the Lifecycle Manager database user requires specific additional grants when using MySQL. These grants are required for successful completion of the Initialize Repository Database configuration action; otherwise, the task fails.
For an example of how this task fits into the installation process, see Database notes: MySQL with Lifecycle Repository (installation doc for version 2020.2.x).
Install Configuration Data and Indexes in MongoDB
The Install Configuration Data and Indexes in MongoDB task runs the Install MongoDB Collections wizard, as shown below.
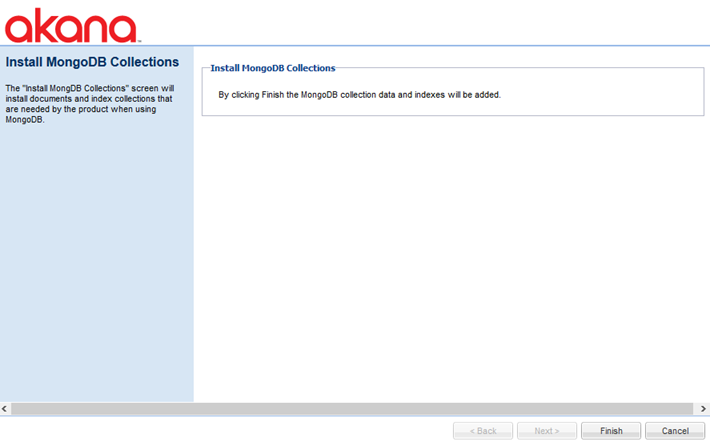
This task scans the Akana API Platform runtime for any data seeders that have been installed into the OSGi runtime and registered via Spring. The data seeders have a check to determine whether or not they need to be run. If they do not need to be run, this task is not presented as a pending task. Therefore, this task appears as part of the installation or upgrade process as a Pending Installation Task if it's needed, and is ignored if it is not needed.
If you're using automation recipes (see Automation Reference Guide), this task is run automatically, whenever a new container is deployed (whether a new installation or an upgrade scenario), if the deployment is using MongoDB. It is run as part of the automation recipe mongo.json.
Manage Admin Console Administrator
The Manage Admin Console Administrator task runs the Manage Administrator Wizard, as shown below.
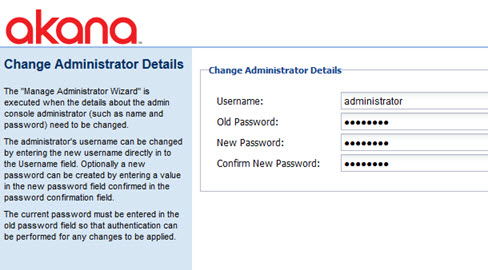
This allows you to set up, or change, the details about the Admin Console Administrator. For example, use this task if you need to change the username and password for the Administrator.
You'll need the old password in order to make any changes.
To complete the Manage Admin Console Administrator configuration action
- In the Admin Console, click the Configuration tab.
- In the Configuration Actions section, choose Manage Admin Console Administrator. The Change Administrator Details page appears.
- To change the username, type the new value in the Username field.
- To change the password, type the old and new passwords and confirm.
- Click Finish.
Manage PKI Keys
The Manage PKI Keys wizard is executed as either an installation task or configuration action. The wizard allows you to configure the private key and certificate for the container.
Note: In a production environment you'll need to have a certificate signed by a Certificate Authority with a recognized chain of trust. We recommend that you always maintain external keys for your containers, and upload them using the Import Private Key & X.509 Certificate option as shown below.
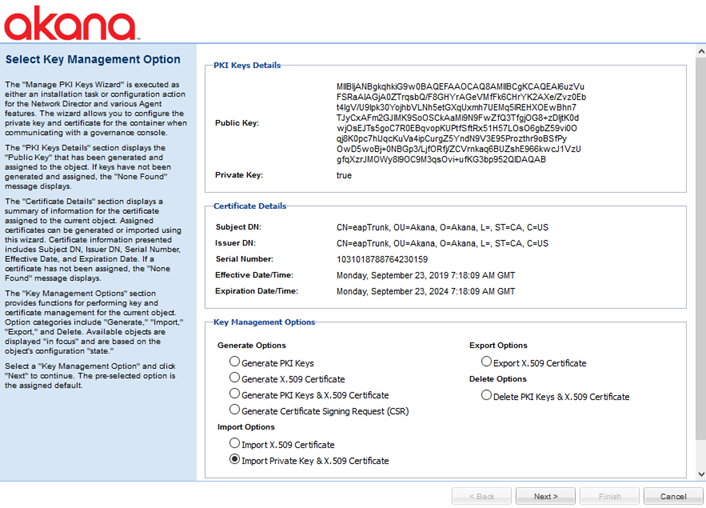
This wizard has the following sections:
- PKI Keys Details
- Displays the public key that has been generated and assigned to the object. If keys have not been generated and assigned, the None Found message displays.
- Certificate Details
- Displays a summary of information for the certificate assigned to the current object. Assigned certificates can be generated or imported using this wizard. Certificate information presented includes Subject DN, Issuer DN, Serial Number, Effective Date, and Expiration Date. If a certificate has not been assigned, the None Found message displays.
- Key Management Options
- Provides functions for performing key and certificate management for the current object. Option categories include Generate, Import, Export, and Delete. Available objects are displayed in focus and are based on the object's configuration state.
- Select a Key Management Option and click Next to continue. The pre-selected option is the assigned default. For more information about each option, refer to Managing Keys and Certificates.
For an example of how this task fits into the installation process, see Installation wizard: Manage PKI Keys (installation doc for version 2020.2.x).
To import a private key and X.509 certificate
- In the Admin Console for the container, go to Configuration.
- Under Configuration Actions, on the left, choose Manage PKI Keys.
- On the Select Key Management Option page, select Import Private Key and X.509 Certificate and click Next.
- On the Select Key Management Option page, shown above, specify Keystore Type: Java or PKCS12.
- In the Keystore Path field, navigate to the location of the keystore and choose it.
- Enter the keystore password and confirm it.
- Click Load Aliases and select a key alias.
- Enter the password for the alias and confirm it.
- Click Finish.
Manage Schemas
The Install Schemas page allows you to manage schemas associated with the current container. Schemas add tables to the database used by the container and populate them with data.
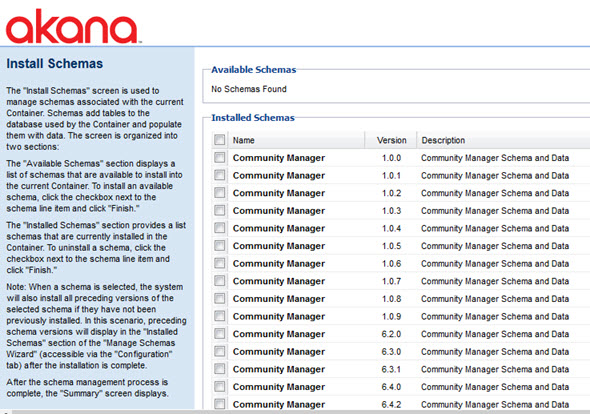
This page has two sections:
- Available Schemas—Displays a list of schemas that are available to install into the current container. To install an available schema, check the checkbox next to the schema line item and then click Finish.
- Installed Schemas—Provides a list of schemas that are currently installed in the container. To uninstall a schema, check the checkbox next to the schema line item and then click Finish.
Note: When you select a schema, the system also installs all preceding versions of the selected schema, if they have not been previously installed. In this scenario, preceding schema versions are displayed in the Installed Schemas section of the Manage Schemas Wizard (accessible via the Configuration tab) after the installation is complete.
After the schema management process is complete, the Summary screen displays.
For an example of how this task fits into the installation process, see Installation wizard: Manage Schemas (installation doc for version 2020.2.x).
Migrate OAuth Data to MongoDB
If you're migrating from RDBMS to MongoDB and you use OAuth, you'll need to run a data migration task to ensure that OAuth tokens issued before the upgrade can still be used.
One reason you might want to migrate OAuth data to MongoDB is so that you can write OAuth tokens from multiple data centers to a local database. OAuth tokens and grants can be distributed globally, so that an API Gateway cluster in one data center will be updated with information about new tokens and grants in near realtime.
After migrating the data, you'll also need to update a configuration property and restart the container. Follow the steps below.
To migrate OAuth data to MongoDB
- In the Admin Console for the Policy Manager/Community Manager instance, under Configuration Actions, run the Migrate OAuth Data to MongoDB task, as shown below.
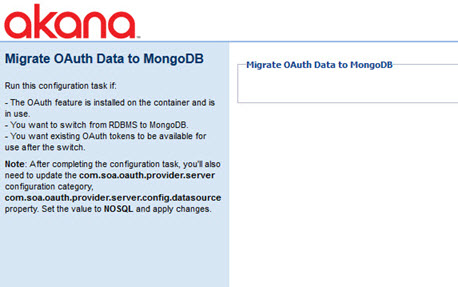
- In the Admin Console, click the Configuration tab.
- Under Configuration Categories, find the com.soa.oauth.provider.server category.
- Find the com.soa.oauth.provider.server.config.datasource property and change the value from JDBC to NOSQL.
- Click Apply Changes.
- Restart the Policy Manager/Community Manager container and then, when PM/CM is started, restart the Network Director container.
After updating this property, the server for the OAuth Provider is now the NOSQL database (MongoDB).
Provisioning
As part of product installation, the Provisioning pending installation task opens the Provisioning wizard. This task Initializes resources associated with the features installed on the container.
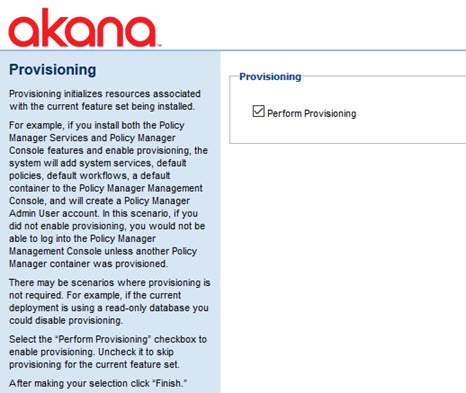
For more information, and an example of how this task fits into the installation process, see Installation wizard: Provisioning (installation doc for version 2020.2.x).
For an example of how this task fits into the upgrade process, see Provisioning (upgrade doc).
Rebuild CM Styles
As part of every upgrade, if you're using the Community Manager developer portal, you'll need to complete the Rebuild CM Styles configuration action in all containers where the Community Manager feature is installed.
This makes sure that you have the latest style updates, for all themes and tenants.
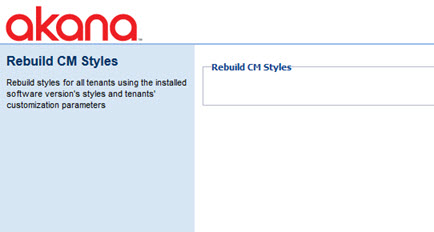
This step will be included as part of the upgrade process.
To rebuild CM styles
- In the Admin Console, click the Configuration tab.
- In the Configuration Actions section, choose Rebuild CM Styles.
- When done, click Finish.
For an example of how this task fits into the upgrade process, see To rebuild CM styles (upgrade doc).
Set Lifecycle Repository Password
This configuration action allows you to set the superuser password for the Lifecycle Repository feature.
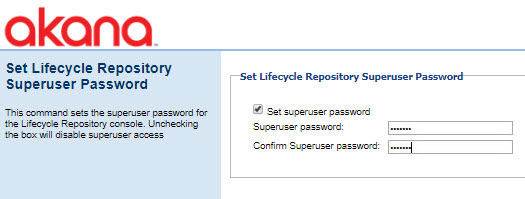
At the Set Lifecycle Repository Superuser Password page, type in the password, confirm, and then click Finish.
For an example of this task fits into the Lifecycle Manager installation process, see To configure the Lifecycle Manager feature on a container (Lifecycle Manager installation doc).
Set Topology API Credentials
This configuration action, used with the Lifecycle Coordinator product, allows you to specify credentials for the Topology API.
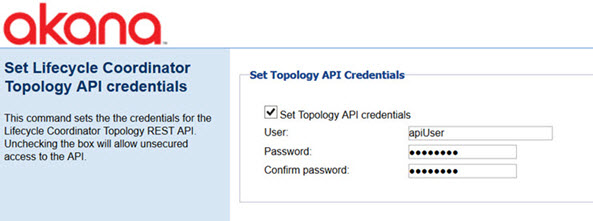
For more information, and installation instructions for Lifecycle Coordinator, see Securing the Topology REST API.
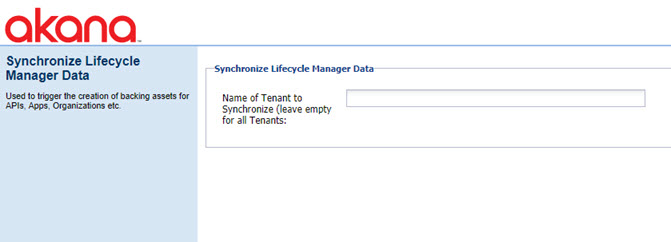
Synchronize Lifecycle Manager Data
In a scenario where you already have resources set up, such as apps, APIs, and business organizations, and want to back-populate your Lifecycle Manager library, you can use the Synchronize Lifecycle Manager Data configuration action.
For example, this might be used in a scenario where an existing Community Manager implementation is now going to start using the Lifecycle Manager feature.
This task is on the Configuration Actions list only if you have the Akana Lifecycle Coordinator feature installed.
Update CM API
If you're upgrading, and the new version includes changes to the CM API, you might need to complete the Update CM API configuration action as part of the upgrade process, in all containers where the Community Manager feature is installed.
If it's needed, this step will be included as part of the upgrade process.
To complete the Update CM API configuration action
- In the Admin Console, click the Configuration tab.
- In the Configuration Actions section, choose Update CM API.
- When done, click Close.
Update OAuth API
This task updates the Provisioned OAuth Agent and Resource Server APIs.
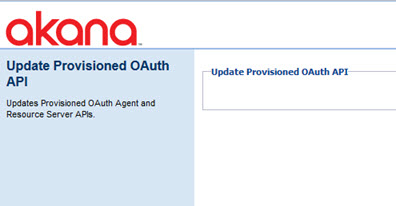
Click Finish, review the summary, and then click Close to exit.
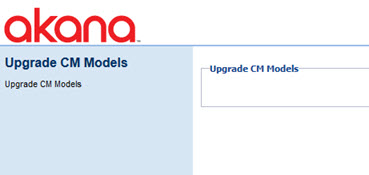
Upgrade CM Models
If you're upgrading, and the new version includes changes to the CM model objects, you'll need to complete the Upgrade CM Models configuration action as part of the upgrade process, in all containers where the Community Manager feature is installed.
If it's needed, this step will be included as part of the upgrade process.
To complete the Upgrade CM Models configuration action
- In the Admin Console, click the Configuration tab.
- In the Configuration Actions section, choose Upgrade CM Models.
- When done, click Close.
For an example of how this task fits into the upgrade process, see To complete the Upgrade CM Models configuration action (upgrade doc).
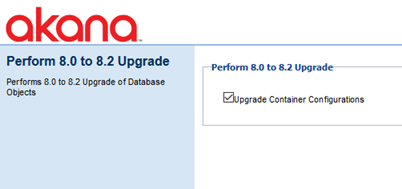
Upgrade Database Objects to 8.2 Model
If you're upgrading from a version earlier than 8.2, you'll need to install the Akana PM 8.2 Upgrade tool (see Installation Tools), which adds a Pending Installation task/Configuration Action, Upgrade Database Objects to 8.2 model. This opens the Perform 8.0 to 8.2 Upgrade page. This task upgrades Policy Manager database objects from version 8.0 to version 8.2.
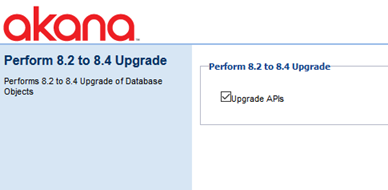
Upgrade Database Objects to 8.4 Model
If you're upgrading from a version earlier than 8.4, you'll need to install the Akana 8.2 to 8.4 model upgrade tool (see Installation Tools), which adds a Pending Installation task/Configuration Action, Upgrade Database Objects to 8.4 model. This opens the Perform 8.2 to 8.4 Upgrade page. This task upgrades Policy Manager database objects from version 8.2 to version 8.4.
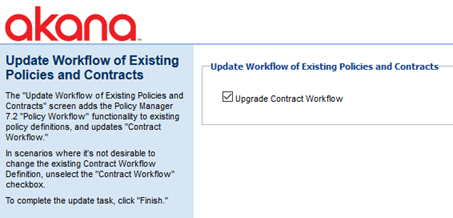
Upgrade Policies and Contracts
If you're upgrading from a version earlier than Policy Manager 7.2, you'll need to install the Akana PM 7.2 Upgrade tool (see Installation Tools), which adds a Pending Installation task/Configuration Action, Upgrade Policies and Contracts. This opens the Update Workflow of Existing Policies and Contracts page. This task upgrades Policy Manager database objects to version 7.2.
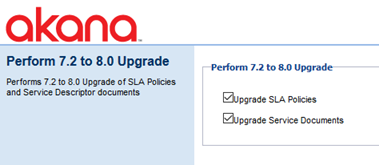
Upgrade SLA policies and Service Document Descriptors
If you're upgrading from a version earlier than Policy Manager 8.0, you'll need to install the Akana PM 8.0 Upgrade tool (see Installation Tools), which adds a Pending Installation task/Configuration Action, Upgrade SLA policies and Service Document Descriptors. This opens the Perform 7.2 to 8.0 Upgrade page. This task upgrades Policy Manager database objects to version 8.0.