Community Manager developer portal Customization and Branding
Learn how to manage platform customization styles and templates.
Note: For detailed information and procedures for customizing the user interface, refer to Detailed Customization Document.
Table of Contents
Customization Basics:
- Site customization best practices
- I want to customize site pages—where do I start? (2020.1.0 and later)
- What functions are available to the Site Administrator on the Customization page? (2020.1.0 and later)
Customization Files:
- How do I download customization files? (2020.1.0 and later)
- What is the file structure for the customization files? (2020.1.0 and later)
- What does each of the customization files do?
Customization Samples:
- What are the customization samples? (2020.2.0 and later)
- How do I get the customization samples? (2020.2.0 and later)
- How do I use the customization samples? (2020.2.0 and later)
Customizing Site Styles:
- What is less.js and what are the benefits?
- I want to customize platform styles. What do I do?
- Which platform CSS file should I update?
- How do I customize how Markdown looks in the Community Manager developer portal?
- What color scheme changes are supported on my platform deployment?
- What style sheets do I use to update the color scheme of my platform deployment?
- How do I download the platform CSS?
- How do I upload the custom.less file after I've updated it?
- After I update my custom.less file, how do I apply the changes to my platform deployment?
- How do I rebuild my color scheme styles after I have uploaded the custom.less file?
- What is a sprite?
- How do I modify sprite colors?
- How do I upload sprite files to the Community Manager developer portal?
- How do I make my style and sprite file changes visible on my platform deployment after I regenerate styles?
- How can I determine the theme name?
- Where do I store customization files for Hermosa theme?
- How do I upload style sheets to the Community Manager developer portal?
- How do I upload the API and Online Help content style sheet to the Community Manager developer portal?
- How do I customize fonts in the Community Manager developer portal?
- How do I customize fonts by referencing an external font?
- How do I customize fonts by uploading font files?
Branding the Community Manager developer portal:
- How do I configure a custom logo?
- How do I customize the page header?
- How do I customize the page footer?
- How do I modify the default icon for apps, APIs, or other resources?
- How do I modify the favicon for the Community Manager developer portal?
Customizing Site Pages:
- How do I customize the left menu bar?
- How do I modify the landing page for the Community Manager developer portal?
- How do I customize so that users are taken to a different page after login?
- How do I customize the Support page?
- Can Test Client use CORS to send the requests to the API endpoint directly without using the Forward Proxy?
- What are the metadata.json and widget_factory.json files, and how do I use them for customization?
- How do I upload resources to the Community Manager developer portal?
Customization Basics:
Site customization best practices
Here are some tips to help you be successful in site customization:
- Have a base theme without customization—Keep a base theme version for Admin access, without customization. If you apply customization to your base theme, it will apply to all themes based on that one. It's better to clone the theme to a new theme and make the customizations in the clone. That way, if anything goes seriously wrong, you can log in on the base theme to fix it.
- Plan first—Review the options before you start, to make sure you've chosen the correct path. For example, if there is already customization in place, and you want to modify it, choose Download Custom Styles rather than Download Custom Style Template. See I want to customize platform styles. What do I do?
- Back up—It's a good idea to keep a backup copy of the original file and any customization versions that you implement, as a manual version control. If you're not happy with the results when you upload the new customizations, you can revert to the previous version before troubleshooting.
- Use change tracking—Use change tracking on modifications to your offline customization assets. This gives you the history of points where specific changes were made.
- Test—Always review the modifications you've made and make sure the results are as expected.
- Have a reversion plan—Always have a reversion path so that if something is not as expected, you can go back to the previous version.
I want to customize site pages—where do I start?
Valid in Version: 2020.1.0 and later
In versions prior to 2020.1.0, when customizing files, the Site Admin had to create an exact folder structure within the Community Manager developer portal, in File Manager, and create and upload the customization files.
In 2020.1.0 and later, you can provision your Community Manager developer portal instance with a theme-specific set of starter files for customization in the More > Admin >Customization page, via these two options:
- Generate customization files—Generates a set of files for the specified theme.
- Download customization files—Downloads a ZIP file of the customization files for the specified theme. Users can then customize the files offline and upload the updated files.
Note: If customization files are already in place, they are not overwritten.
What functions are available to the Site Administrator on the Customization page?
Valid in Version: 2020.1.0 and later
to get to the Customization page, choose More > Admin >Customization.
On this page, the Site Admin can perform several key tasks relating to provisioning, downloading, and uploading customization files for one or more platform themes. For an overview of themes, see What is a platform theme?
You can create a set of basic files from the platform defaults, download the default files, customize offline, and then upload the new files. And then, of course, test.
The table below shows the basic functions available on the Customization page. Click through for more information as needed.
| Use this element... | To... |
|---|---|
| Themes drop-down list |
Choose the theme that you're working with. Note: Make sure you've picked the correct theme. It's particularly important not to upload customization files to the wrong theme. For information about the available themes, see What themes are available? |
| File Manager |
To access the customization files structure at the /resources folder, click the File Manager button. This is the same action as going to More > File Manager > Resources File Manager. Direct access to the File Manager resources folder is provided on the Customization page for your convenience. For information about using File Manager, see File Manager. |
| Download Custom Style Template |
Allows you to download the default style customization file template (custom_template.less), to use as a starting point in customizing platform styles. If you want to customize, and you don't have any customization already in place, download these files as a starting point. For instructions, see To customize platform styles. In Step 4, choose the first option. Essentially you will download the file, rename it to custom.less, then apply customization such as custom colors, sprite URLs, and the site logo, and then upload the revised custom.less file in Upload Custom Styles. The styles and the /resources folder are automatically regenerated as part of the upload process. |
| Download Custom Styles |
Download the latest version of the style customization file (custom.less). You can then make any additional customization changes needed, and then upload the revised file using the Upload Custom Styles option. |
| Rebuild Styles | Initiates a rebuild of the platform style sheets. Primarily used when a platform update is installed that includes style sheet changes. |
| Upload Custom Styles |
Allows you to download the set of style customization files currently in place in the specified theme. If you already have customization in place, and want to apply additional customization, download these files so that you know you're starting with the latest files. For instructions, see To customize platform styles. In Step 4, choose the second option. |
| Generate Customization Files |
Create the folder structure for the specified theme, and populate it with all the default resources needed to customize the theme. Any customization files already in place are not modified. Use this option to generate the default file set in the Community Manager developer portal. One advantage of generating the default files (sometimes called scaffolding since with this action the platform creates the framework, or skeleton, for customization) is that the platform builds the folder structure that you'll need. For example, you might want to modify only one or two of the files. When the default files are in place, you won't have to manually create the folder structure and you can be certain that the file paths are correct. |
| Download Customization Files |
Download the default set of resources required for customizing the theme. You can customize offline and then upload via File Manager. For more information, see How do I download customization files? |
|
Download Customization Samples Version: 2020.2.0 and later |
Download a ZIP file containing customization samples, and instructions, for customizing the Community Manager developer portal user interface. For more information, see Customization Samples. |
Customization Files:
How do I download customization files?
Valid in Version: 2020.1.0 and later
You can download all the customization files, in ZIP file format, to an external location.
The set of customization files is different for each theme. Make sure you choose the correct theme before downloading.
To download customization files
- Log in as a Site Admin and go to the Admin section.
- Go to Customization.
- From the Theme drop-down list, choose the theme. For more information, see What is a platform theme? and Platform user interface "theme".
- Click Download Customization Files, navigate to the download folder, and save the file (scaffolding.zip).
Note: If you have multiple themes, it's a good idea to rename the ZIP file to include the theme name; for example, scaffolding_hermosa.zip.
What is the file structure for the customization files?
Valid in Version: 2020.1.0 and later
The customization files are different for each theme:
Customization files: Bonita theme
For information about the files in the customization ZIP file, see Bonita Custom File Structure (detailed customization document).
Customization files: DevOps theme
The customization ZIP file for DevOps theme includes these folders and files:
- less\custom.less
- locales\custom_en-us.json
- SOA\LCC\extensions\init.js
- SOA\LCC\extensions\nav_extensions.ejs
- SOA\LCC\extensions\quick_links_extensions.ejs
- SOA\LCC\extensions\widget_factory.js
- SOA\LCC\footer\views\\footer.ejs
- style\images\logo.png
For details about each file, see What does each of the customization files do?
Customization files: Hermosa theme
For information about the files in the customization ZIP file, see Hermosa Custom File Structure (detailed customization document).
Customization files: SimpleDev theme
The customization ZIP file for SimpleDev includes these folders and files:
- less\custom.less
- locales\custom_en-us.json
- SOA\Dev\app_page\views\app_sub_nav.ejs
- SOA\Dev\extensions\init.js
- SOA\Dev\extensions\nav_extensions.ejs
- SOA\Dev\extensions\quick_links_extensions.ejs
- SOA\Dev\extensions\widget_factory.js
- SOA\Dev\footer\views\footer.ejs
- SOA\Dev\nav\views\nav.ejs
- SOA\Dev\quick_links\views\quick_links.ejs
- SOA\Dev\user_profile_page\views\user_profile_sub_nav.ejs
- style\images\logo.png
For details about each file, see What does each of the customization files do?
What does each of the customization files do?
Below is a summary of what each of the customization files does, for DevOps and SimpleDev themes.
For information about the files for Hermosa and Bonita themes, refer to the links above.
| This folder/file... | Performs this function... |
|---|---|
| app_sub_nav.ejs | Allows you to customize the left menu items for app pages. |
| custom.less |
Allows you to customize the styles in the site, in LESS pre-compiler format. For more information, see What is less.js and what are the benefits? |
| custom_en-us.json | Overrides default actions (that is, default page after login), as well as labels and messages in the Community Manager developer portal pages. |
| footer.ejs | Allows you to customize the footer content of the Community Manager developer portal pages. |
| init.js |
The initialization file for customization. All custom JavaScript files that are used for customization must be loaded in init.js. For an example of how you can use the init.js file for customization, see Can Test Client use CORS to send the requests to the API endpoint directly without using the Forward Proxy? |
| logo.png | The logo that is displayed on site pages. By default, logo.png is an Akana logo. Change it to your own logo, using the same file name. |
| nav.ejs | The original content of the top menu items in the header. Can be updated to modify/remove items from the original top menu items in the header. |
| nav_extensions.ejs |
Allows you to add items to the top menu in the header. |
| quick_links.ejs | The original content of the user profile pull-down menu items in the header. Can be updated to modify/remove items from the original user profile pull-down menu items in the header. |
| quick_links_extensions.ejs |
Allows you to add items to the user profile pull-down menu in the header. |
| user_profile_sub_nav.ejs | Allows you to customize the left menu items for user profile pages. |
| widget_factory.js |
Allows you to configure any new pages that were added in metadata.json. (Bonita, DevOps, Simple Dev) |
Customization Samples:
What are the customization samples?
Valid in Version: 2020.2.0 and later
The Customization page offers an option to download customization samples that you can use to get started with customizing the Community Manager developer portal user interface. Each sample is a working example of a customization task, with a set of files and a readme with instructions.
The customization ZIP file includes examples for different themes. For example:
- Advanced header customization
- Creating a custom login page.
For more information about using this customization example, see Login Entry Page (valid in version: 2020.2.4 and later).
- Globalization
- Adding a new static page
- Implementing custom fonts
How do I get the customization samples?
Valid in Version: 2020.2.0 and later
You can download a ZIP file of customization samples, to an external location.
The ZIP file includes samples for different themes.
To download customization samples
- Log in as a Site Admin and go to the Admin section.
- Go to Customization.
- Click Download Customization Samples, navigate to the download folder, and save the file (customization_samples.zip).
How do I use the customization samples?
When you've downloaded the customization ZIP file, unzip it and review the available samples. Each sample comes with a readme file with information about the sample files.
Use the sample to experiment with the feature, following the instructions in the readme. When your test files are ready, upload them to the Community Manager developer portal and review the results.
Note: Take a backup of any existing files before you overwrite them with a new version, so that you can easily revert if you find that you made a mistake.
For detailed information and procedures for customizing the user interface, refer to Detailed Customization Document.
Customizing Site Styles:
What is less.js and what are the benefits?
The custom.less style sheet in the Community Manager developer portal is implemented with LESS, a dynamic stylesheet language that extends the static CSS by adding a dynamic behavior in the CSS.
- LESS.JS is a CSS pre-processor that allows you to write your own styles using the LESS pre-processor language and save them in a .LESS file.
- LESS.JS will compile the file into pure CSS. LESS variables are defined with an @ sign and Variable assignment is done with a colon (:). After you update the custom.less style sheet and rebuild, the values of the variables are inserted into the output CSS document.
- LESS helps reduce the size of the CSS and allows you to quickly and easily make changes to the platform color scheme and sprite files by updating one custom.less file and then rebuilding the complete set of site stylesheets.
I want to customize platform styles. What do I do?
The platform comes with a default look and feel, including styles, colors, navigation, logo, and so on. These platform default styles are stored in a stylesheet which is dynamically generated from a file named custom.less.
For detailed instructions on how to customize platform styles, refer to Customizing Page Styles in the customization doc.
Which platform CSS file should I update?
All customizations should be stored in custom.less as explained in I want to customize platform styles. What do I do?
The platform uses other stylesheets, such as style.css or supplement.css. Do not modify these stylesheets. Some of the benefits of storing your customizations in custom.less:
- All customized styles are in one place.
- You can always revert back to the platform default if needed.
- Your custom styles will not be overridden by the platform's CSS hierarchy
- Your custom styles will not be overridden by platform updates
How do I customize how Markdown looks in the Community Manager developer portal?
The Community Manager developer portal includes a set of default style definitions for the styles supported for Markdown. These styles are defined in the platform's custom.less style file.
To find the Markdown styles:
- Log in as a Site Admin and go to the Admin section.
- Go to Customization.
- From the Theme drop-down list, choose the theme. For more information, see What is a platform theme? and Platform user interface "theme".
- To download the customized style sheet, custom.less, click Download Custom Styles.
- Search for Markdown.
You'll see the section that defines the Markdown styles. For example:
// @markdown-preview-font-size-h1: 36px;
The above defines the style that's rendered for the h1 Markdown:
# This is a Heading 1 in Markdown
Modify the styles you want to change, remove the comment marks on any lines that you've changed (// at the beginning of the line), and then upload the revised custom.less file. The platform rebuilds the css based on the uploaded file, and the new styles are effective for both new and revised user-generated Forum entries that use Markdown.
For example, to change the default color for headings to red, find this line:
// @markdown-preview-headings-color: inherit;
and change it, as per the example below (you can also use any color values supported by standard CSS):
@markdown-preview-headings-color: red;
Then upload the modified file. See How do I upload the custom.less file after I've updated it?
To see the changes immediately, you'll need to clear cache. Active users do not see the changes immediately since the styles are cached for up to 30 minutes. After that point, everyone will see the revised styles.
For more information on modifying custom styles, see I want to customize platform styles. What do I do?
For more information on the use of Markdown for Forum items in the Community Manager developer portal, see Using Markdown.
What color scheme changes are supported on my platform deployment?
You can change the color scheme for platform elements such as:
- Site background color
- Left and top navigation
- Text content area
- Pop-up dialog elements
- Horizontal rules
- Text color of input fields
- Default link colors
Color scheme updates are performed by updating the custom.less style sheet. For an overview of the process, and instructions, see I want to customize platform styles. What do I do?
What style sheets do I use to update the color scheme of my platform deployment?
The platform offers two options for downloading the platform style sheet, which is the starting point for customization of platform styles:
- Download the default style sheet template, custom_template.less.
If you make customizations, and later want to revert, you can do so. Download the template: More > Admin >Customization. Specify the theme, and then click Download Custom Style Template. Rename it to custom.less. Then upload it: More > Admin >Customization. Specify the theme, and then click Upload Custom Styles.
- Download the custom style file currently in use.
If you haven't yet uploaded customizations, custom.less is the same as custom_template.less. If you've already uploaded customizations and are happy with them, but want to make further changes, you can download custom.less and build on that (but save a backup copy). In the Community Manager developer portal: More > Admin >Customization. Specify the theme, and then click Download Custom Styles.
Some general points regarding the platform style sheet:
- All of the variables and sprite file references in the custom_template.less file are configured with defaults that represent the look and feel of a default platform installation.
- All custom.less style sheet variables are commented out. For site elements you want to customize, remove the comment from the element and then customize the variable.
- Color management for icons is accomplished by modifying the Adobe Illustrator file that includes the sprite icons. Download a ZIP containing the Adobe Illustrator files.
How do I download the platform CSS?
The platform CSS rules are documented in a file called custom.less. To customize platform css, first download the custom.less file, then customize the file, and then upload the revised file.
When you upload the custom.less file, the platform automatically rebuilds the styles and uses the new rules.
To download the latest version of the style customization file for the platform (custom.less file)
- Log in as a Site Admin and go to the Admin section.
- Go to Customization.
- From the Theme drop-down list, choose the theme. For more information, see What is a platform theme? and Platform user interface "theme".
- Click Download Custom Styles to download the customized style sheet, custom.less.
- Choose a save location to save the file.
Note: It's a good idea to keep a backup copy of the original file and any customization versions that you implement, as a manual version control. If you're not happy with the results when you upload the new customizations, you can revert to the previous version before troubleshooting.
How do I upload the custom.less file after I've updated it?
The More > Admin >Customization section includes an Upload Custom Style button that allows you to upload the custom.less file after you've customized it.
To upload the modified custom.less file
- Log in as a Site Admin and go to the Admin section.
- Go to Customization.
- From the Theme drop-down list, choose the theme. For more information, see What is a platform theme? and Platform user interface "theme".
- Click Upload Custom Styles.
- Go to the location of the modified file and upload it. When you upload the file, the platform styles are automatically rebuilt using the new file. When regeneration is complete a confirmation message is displayed. The custom.less file is stored in the \resources\less directory.
- Clear the browser cache and refresh the page to review the changes.
After I update my custom.less file, how do I apply the changes to my platform deployment?
After you update your custom.less file, you can apply the changes to the platform deployment by uploading the modified file. When you upload the file, the site automatically rebuilds the site style sheets and the changes are reflected on the site. See How do I upload the custom.less file after I've updated it? for more information.
If the style sheet and sprite file changes are not visible immediately after the style sheet rebuild process is complete, clear the browser cache and then refresh.
Note: If you want to go back to the default styles at any point, you can always go back to the custom_template.less file. See Customizing Page Styles.
How do I rebuild my color scheme styles after I have uploaded the custom.less file?
The platform includes a Rebuild Styles option that allows you to initiate a rebuild of the platform style sheets. This is primarily used when a platform update is installed that includes style sheet changes.
For example, if an update was applied to the site and the update included new additions to the UI that required style sheet changes; this would mean that the style sheets were not active immediately after the update was completed. In this case, the Rebuild Styles option would complete update process by regenerating the style sheets.
To rebuild styles in the Community Manager developer portal
- In the Community Manager developer portal, log in as a Site Admin and go to the Admin section.
- Go to Customization.
- From the Theme drop-down, choose the theme, and then click Rebuild Styles.
It might take a little while for the styles to be rebuilt. When it's done, you'll see the message Platform style sheets have been successfully regenerated using custom.less. Clear cache and refresh the page.
What is a sprite?
Note: This content is applicable only to Default Theme (versions prior to 2020.2.0).
A sprite is a two-dimensional image used by the Community Manager developer portal CSS to control the colors in platform default icons and images.
The platform UI includes a series of standard icons that are used for standard components of the UI such as quick filters, help, menu navigation names, and window titles. Although the icons and images cannot themselves be changed, the colors can be changed, as part of UI customization.
In Default Theme, you can customize icons by changing the colors of the sprite files.
Hermosa Theme uses a different approach to customization of icons—Font Awesome. See http://fontawesome.io (external link).
Hermosa Theme uses sprites only for transaction logs.
When developing your UI customization design, in addition to deciding what colors you want to use on your site, you must also decide what icons and "contrasts" you want, before moving forward with the customization tasks. This task should be part of your site UI design process.
The platform provides a set of sprite files for Default Theme. You can view how the sprite files are specified, in the custom_template.less file. Each one is commented with " // path to the image file" and lists a URL that represents the path of the file.
Sprite files should always be uploaded after you have uploaded and regenerated your style sheets. For instructions, see How do I upload sprite files to the Community Manager developer portal?
How do I modify sprite colors?
Note: This content is applicable only to Default Theme (versions prior to 2020.2.0).
During the UI design phase of your platform deployment your brand standards and colors are selected. The site includes a series of icons. The icon design is fixed and part of the site design, but the icon color and contrast can be changed by modifying the sprite files used by the platform icons. The general process for modifying icon colors involves the following steps:
- To change icon color and contrast, you'll need to update one or more of a series of sprite files that define the color contrast for platform icons, by modifying the applicable Adobe Illustrator file provided by Akana. Download a ZIP containing the Adobe Illustrator files.
- The process involves selecting the Artboard that includes the icon you want to modify, changing the icon color, and saving the Artboard to a PNG file. The PNG file must then be uploaded to the /resources/theme/{theme_name}/styles/images folder via More > Admin >File Manager, Resources File Manager, to be updated in your platform UI.
- For detailed instructions on how to modify sprite files, see Modifying Sprite Colors (separate PDF file).
- If you save a sprite file to a filename that is not referenced in the custom_template.less file, edit the custom_template.less file and update the path to reflect the new filename. For example, if a particular icon was gray and you wanted it changed to orange, you might save your artwork to a new filename that reflected the color change or you could develop a naming convention using numbers, etc. The following example is an excerpt from a custom_template.less file that illustrates a sprite file URL reference:
// path to the image file of 18px sprites of leftnav navigation items that reflect the current section of "subject" details // @leftnav-active-icons: @icon-active-18px: url("images/sprites_18_color.png"); - If you updated a style sheet, use the Rebuild Styles option to regenerate the styles before uploading any new sprite files. Note that this function rebuilds all the folders in the /resources/theme/{theme_name}/styles directory. Because of this, new sprite files must be uploaded after the site styles are regenerated.
- If you add a new Artboard to the Adobe illustrator file, or save an existing Artboard with a different name, you must upload the updated sprite files to the platform via More > Admin >File Manager. In the Resources section, click File Manager. The File Manager window opens at the resources folder. Save them in the /resources/theme/{theme_name}/style/images folder. Perform this step after rebuilding styles (Rebuild Styles option).
- After styles are regenerated and sprite files are uploaded, clear the browser cache and refresh the page to view the changes.
- For information on uploading sprite files to the platform, see How do I upload sprite files to the Community Manager developer portal?
How do I upload sprite files to the Community Manager developer portal?
Note: This content is applicable only to Default Theme (versions prior to 2020.2.0).
If you've updated one or more sprite files, you can create an /images folder in the /resources/theme/{theme_name}/style directory and upload them. Sprite files must be uploaded AFTER you have uploaded your custom.less file and have rebuilt the site styles (either automatically as part of the custom.less upload process, or manually by executing the Rebuild function).
To upload sprite files to the Community Manager developer portal
- Log in as a Site Admin and go to the Admin section.
- Go to File Manager.
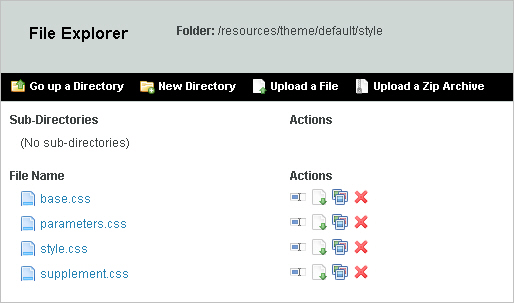
- In the Resources section, click File Manager. The File Manager window opens at the resources folder. Go to the /resources/theme/{theme_name}/style directory. You will see the following default styles which were auto-generated as part of the custom.less upload process.
- Click New Directory and assign the name images.
- Go to the /images directory.
- Click Upload. The File Upload dialog box displays. Select the sprite file you would like to upload and click Open.
- Click Upload to upload the file to the selected directory. Repeat this process until all the sprite files are uploaded.
How do I make my style and sprite file changes visible on my platform deployment after I regenerate styles?
In most cases, after you regenerate styles and upload your sprite files you must clear the browser cache and refresh the page to view the changes.
How can I determine the theme name?
For some customization tasks, where you're creating custom files and uploading them to the platform, you'll need to know the theme name for the version of the Community Manager developer portal you're using.
The theme name is determined when the platform is created, so you might not know what it is.
If you're not sure, follow the steps below to check the theme name for your installation.
To determine the theme name for your installation
- Log in to the Community Manager developer portal as the Site Admin.
- Go to Customization.
- In the Theme drop-down at the top, click to see what options are available to you. Check the theme name on the list. For a full list of themes, see What themes are available?
Note: the list of themes on the Customization page shows the themes that have been created for your installation. It might not include the full list of possible themes.
Use the applicable value, exactly as it's represented on the list, in your customization tasks.
Where do I store customization files for Hermosa theme?
If you want to customize Hermosa theme, first create the default set of customization files. See How do I download customization files?
Note that it is best to keep a base theme version for Admin access, without customization—clone a theme before customizing. See Site customization best practices.
The customization files for a specific theme are in a subfolder, named for the theme, in the /resources/theme folder.
For example, for Hermosa theme:
- /resources/theme/hermosa/locales/custom_en-us.json (for custom code that affects page behavior)
- /resources/theme/hermosa/styles (for custom styles)
- /resources/theme/hermosa/styles/images (for custom images such as a favicon)
How do I upload style sheets to the Community Manager developer portal?
When you upload a new custom.less file in the Custom Styles section, the /resources/theme/{theme_name}/style directory is automatically created and includes the site default style sheets. Some points to note:
- These style sheets cannot be updated using the upload process used for static content because the styles are regenerated each time a new custom.less style sheet is uploaded.
- If you want to add new styles to the platform, you must first download the template, custom_template.less, then rename it to custom.less, add the new styles to the custom.less file, and upload the modified file. When you upload the revised file in More > Admin >Customization, Upload Custom Styles, the new styles are added to the site as part of the rebuild process. For more information and detailed instructions, see Customizing Page Styles.
- Only a Site Administrator can update the platform style sheet.
How do I upload the API and Online Help content style sheet to the Community Manager developer portal?
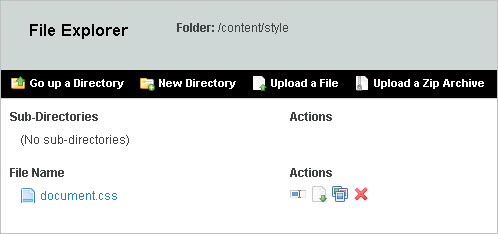
The document.css style sheet contains all the custom styles for both API and Online Help documentation. It is located in the /content/style directory. If you make changes to the document.css file, you can upload it directly to the /content/style directory.
Note: This style sheet is not affected by the custom.less style sheet regeneration process and will not be changed or overwritten when a new custom.less file is uploaded.
To upload a modified document.css style sheet to the platform
- Log in as a Site Admin and go to the Admin section.
- Go to File Manager.
- In the Content section, click File Manager.
- Go to /content/style. You will see a directory similar to the following:
- Click Upload. The File Upload dialog box displays. Select the document.css file and click Open.
- To upload the file to the selected directory, click Upload. If you receive an overwrite message click OK.
How do I customize fonts in the Community Manager developer portal?
You can customize any of the fonts used in the Community Manager developer portal user interface. You'll need to complete the high-level steps below.
To customize fonts in the Community Manager developer portal: high-level steps
- Identify the specific CSS rules you want to customize, using developer tools in the user interface.
- Determine the fonts you want to use and whether you want to reference or upload the fonts.
- Download the platform style file. See How do I download the platform CSS?
- Update the custom.less file to use the new fonts, in one of two ways:
- Referencing an external font file: see How do I customize fonts by referencing an external font?
- Uploading font files: see How do I customize fonts by uploading font files?
- Import the revised CSS. See How do I upload the custom.less file after I've updated it?
- Refresh your browser and review the results.
The steps are essentially the same for Hermosa Theme and Simple Developer theme, with the exception of the file locations for uploading the revised files. For information on the file locations for customization of Hermosa theme, see Where do I store customization files for Hermosa theme?
How do I customize fonts by referencing an external font?
Note: this topic only covers the steps for referencing the external font in the custom.less file. For the full high-level font customization procedure, see How do I customize fonts in the Community Manager developer portal? above.
When you reference an external font, you have to add code in the downloaded custom.less file to do two things:
- Reference the external font file using an @import statement.
- Indicate which styles will use the new font.
Note: It's a good idea to keep a backup copy of the original file and any customization versions that you implement, as a manual version control. If you're not happy with the results when you upload the new customizations, you can revert to the previous version before troubleshooting.
Reference the external font file using an @import statement
Locate your custom.less file and reference the custom font by providing the import URL, as shown below. This example references one of Google's cloud-hosted fonts, "Nixie One." Add this statement at the top of the file:
@import url(https://fonts.googleapis.com/css?family=Nixie+One);
Indicate which styles will use the new font
Modify the CSS rules in the custom.less file to use the new font. The examples below illustrate modifying the font in two different ways:
- Replacing all platform styles with the new font.
- Using the new font on specific elements.
Example 1: Replacing all platform styles with the new font, including headings, menus, error messages, and all other copy elements in the Community Manager developer portal.
@main-font: "Nixie One", Arial, Helvetica, sans-serif;
Example 2: Using the new font on all Header elements and left navigation links.
.headerPanel {
  font-family: 'Nixie One', cursive;
}
.soa-ui-cm-leftnav-item {
  font-family: 'Nixie One', cursive;
}
When you've modified the file, the next step is to upload the revised file and review the results. For the full high-level font customization procedure, see To customize fonts in the Community Manager developer portal: high-level steps above.
How do I customize fonts by uploading font files?
Note: this topic only covers the steps for uploading the fonts and referencing the uploaded fonts in the custom.less file. For the full high-level font customization procedure, see How do I customize fonts in the Community Manager developer portal? above.
When you customize fonts by uploading font files, you have to do three things:
- Upload the font files to the correct location.
- Update the custom.less file to reference the new fonts in the location you uploaded them to, using @font-face.
- Add or modify CSS rules to use the new font.
Upload the font files to the correct location
The platform looks for the font files in a location relative to the supplement.css or style.css files, which are stored in the /resources/theme/{theme_name}/style folder.
It's important to upload the files in the right place, and then use the correct relative path when referencing the font files in the custom.less file. The examples below use a font named advent-pro-v4-latin, and the fonts are stored in a /fonts/advent-pro-v4-latin subfolder. To do this you'd need to complete these steps:
- Prepare the font ZIP file externally. See Prepare the fonts ZIP file below.
- Log in as a Site Admin and go to the Admin section.
- Go to File Manager.
- In the Resources section, click File Manager. The File Manager window opens at the resources folder.
- In the File Manager, click down to the /theme/{theme_name}/style folder.
- Create a fonts folder and navigate down into the folder.
- Choose Upload a ZIP Archive to upload the fonts.zip file that you prepared in Step 1. The fonts are uploaded and are immediately available.
- Next, update the custom.less file to use the new fonts. See Update the custom.less file to reference the new fonts in the location you uploaded them to, using @font-face below.
Prepare the fonts ZIP file
You can create folders and upload files individually, but you can also upload everything in one ZIP file, which is quicker.
For the example above, let's say that you are using one custom font, advent-pro-v4-latin, which includes five individual files for variations of the font.
On your local drive, create a folder that uses the font name, advent-pro-v4-latin, and download the files inside it.
Then, create a ZIP file named fonts.zip and copy the advent-pro-v4-latin folder and its contents into it. Then, you can upload the fonts.zip file in step 5 above.
Update the custom.less file to reference the new fonts in the location you uploaded them to, using @font-face
The next step is to use the css attribute of @font-face to use the new font. Use the example below as a guide.
In this example, you can see that the paths reference the /fonts/advent-pro-v4-latin font files that you uploaded in the previous step. Whatever fonts you are using, make sure the paths are correct for the name and location of your own font files.
Font locations should always be loaded, and referenced, as relative to the /resources/theme/{theme_name}/style folder.
@font-face {
  font-family: 'Advent Pro';
  font-style: normal;
  font-weight: 400;
  src: url('./fonts/advent-pro-v4-latin-regular.eot'); /* IE9 Compat Modes */
  src: local('Advent Pro Regular'), local('AdventPro-Regular'),
  url('./fonts/advent-pro-v4-latin/advent-pro-v4-latin-regular.eot?#iefix') format('embedded-opentype'), /* IE6-IE8 */
  url('./fonts/advent-pro-v4-latin/advent-pro-v4-latin-regular.woff2') format('woff2'), /* Super Modern Browsers */
  url('./fonts/advent-pro-v4-latin/advent-pro-v4-latin-regular.woff') format('woff'), /* Modern Browsers */
  url('./fonts/advent-pro-v4-latin/advent-pro-v4-latin-regular.ttf') format('truetype'), /* Safari, Android, iOS */
  url('./fonts/advent-pro-v4-latin/advent-pro-v4-latin-regular.svg#AdventPro') format('svg'); /* Legacy iOS */
}
Add or modify CSS rules to use the new font
The final preparation step is to update the custom.less file so that specific CSS rules use the new font.
Tip: If you're not sure which rules to change, use the browser developer tools to inspect the elements so you can identify the CSS rule names. There are also comments in the custom.less file to indicate how the various elements are used.
The example below uses the new font on all Header elements and left navigation links.
.headerPanel{
  font-family: 'Advent Pro', sans-serif;
}
.soa-ui-cm-leftnav-item{
  font-family: 'Advent Pro', sans-serif;
}
The next step is to upload the revised file to the Community Manager developer portal and see the results: see How do I upload the custom.less file after I've updated it?
Custom fonts: Additional information
Many fonts are available, free or for purchase, online. Below are a couple of suggestions for free fonts:
- Fonts hosted by Google: https://wwhttps://www.google.com/fontsw.google.com/fonts.
- Sample fonts that you can download and host locally: https://google-webfonts-helper.herokuapp.com/fonts (Google Webfonts Helper).
Branding the Community Manager developer portal:
How do I configure a custom logo?
The process of adding a custom logo to the platform includes configuring your logo to comply with the logo file requirements, specifying the logo filename in the template, and uploading it to the platform.
For logo file requirements and detailed instructions, refer to Logo in the customization doc.
How do I customize the page header?
The page header shows at the top of every site page. By default, it includes links to main areas of the application: Dashboard, APIs, Apps, as well as the user's profile.
For detailed instructions on how to customize the page header, with examples, refer to Header in the customization doc.
How do I customize the page footer?
The page footer shows at the bottom of every site page. By default, it includes links to general information (About, Contact, Terms, Privacy) and a copyright statement. There is a thin line between the page and the footer.
For detailed instructions on how to customize the page footer, with examples, refer to Footer in the customization doc.
When you're done, upload the files into the Community Manager developer portal. Follow the steps below.
Uploading the customization files to the Community Manager developer portal
When you have your customization files ready, the next step is to upload them into the Community Manager developer portal.
Some points to note:
- The file must have the exact path, filename, and extension given here.
- Some of the folders in the path might not exist. If they are not there, create them in the File Manager. Create one folder, then go into it, then create the next, until the path exactly matches the path given. Then, upload the file.
To upload the customization files to the Community Manager developer portal
- Log in as a Site Admin and go to the Admin section.
- Go to File Manager.
- In the Resources section, click File Manager. The File Manager window opens at the resources folder.
- Go to the correct location in the file system, creating folders if needed. If you create a folder, make sure the name and capitalization are exactly as given here. Examples:
- footer.htm: /resources/theme/default/templates/footer/footer.htm.
- CustomApplicationResources.properties: /resources/theme/default/i18n/CustomApplicationResources.properties.
- Exit the File Manager by clicking on the page.
- Clear the cache and refresh the page to see the new footer.
- Test to make sure the links are accurate and everything looks right.
How do I modify the default icon for apps, APIs, or other resources?
The platform includes default icons for apps, APIs, and other resources. You can specify new defaults by uploading new icons of the same filename, size, and type to the folder where the default files are stored.
The folder structure is not visible unless custom assets have already been created. If you have to create the folder structure, make sure you use the exact naming and spelling given below. Essentially you are creating the following files, two sizes for each resource for which you want to customize the icon.
For detailed instructions on how to modify the default icons, refer to Default Icons in the customization doc.
How do I modify the favicon for the Community Manager developer portal?
The favicon is the small icon displayed on the browser tab and possibly in other parts of the browser. You can customize the icon that displays for your installation of the developer platform.
For detailed instructions on how to modify the favicon, refer to Favicon in the customization doc.
Customizing Site Pages:
How do I customize the left menu bar?
The left menu bar for all default pages in the API Platform user interface is controlled by the left_nav.json file.
For detailed instructions on how to customize the left menu bar for Bonita and Hermosa themes, refer to Left Menu in the customization doc.
How do I customize the Support page?
In the Community Manager developer portal user interface, the help link to the right of the top navigation bar leads to the Support page. Here, you can add content that's specific to your version of the Community Manager developer portal. You can also include a link to basic information about the Community Manager developer portal, such as signup: Basics).
The URL for the Support page is:
{hostname}/#/{tenantid}/home/support
For detailed instructions on how to customize this page, refer to Support Page in the customization doc.
How do I modify the landing page for the Community Manager developer portal?
To modify the landing page, you must download it, modify it offline, and then upload it to the same location.
For detailed instructions, refer to Landing Page in the customization doc.
How do I customize so that users are taken to a different page after login?
You can customize the API Platform user interface so that after logging in, rather than being taken to the Action Dashboard, which is the usual behavior, users are taken to a different page that you specify.
For detailed instructions, refer to Login Entry Page in the customization doc.
Can Test Client use CORS to send the requests to the API endpoint directly without using the Forward Proxy?
Yes. You can configure the platform to enable or disable the CORS policy for the purposes of apps testing APIs in the Test Client testing tool.
Regardless of whether the CORS policy is attached to a specific API, this policy is always turned off for the purposes of testing with the Test Client tool.
If you want to turn the CORS policy on as a default in Test Client, you will need to create a file named init.js with some custom lines of code, as given below; if you already have a custom init.js file, add the lines of code at the end of the existing file.
To override the default setting for Same Origin Policy (CORS Policy) in Test Client
Step 1: Check whether you have an existing init.js file
- Log in as a Site Admin and go to the Admin section.
- Go to File Manager.
- In the Resources section, click File Manager. The File Manager window opens at the resources folder.
- Navigate down to resources/theme/{themename}/SOA/Dev/extensions. If the folder structure doesn't exist, click New Directory to create a new subfolder, name it, and then click the new folder name to change directories down one level into the new one. Then create the next one until the folder structure exists and you are in the extensions folder.
Note: Make sure the folder naming, including sequence and capitalization, is exactly as above.
- If the folder structure already exists, and there is an init.js file in the extensions folder, download the file so you can modify it offline.
Step 2: Create or update the init.js file
- Do either of the following:
- If there is an existing init.js file: Modify the file you downloaded above, adding the lines of code given in Modifying the custom init.js file below.
- If there is no existing init.js file: Create the file and add the code as below.
- Customize the init.js file to the required settings. For instructions, review the comments in the code.
Step 3: Upload the customized init.js file
- From the extensions folder, click Upload a File. Go to the location of your custom init.js file and upload the file. If you kept the theme name that is the default, it will look like this:
- resources/theme/simpledev/SOA/Dev/extensions/init.js
- To update the browser, clear the cache and refresh the page. You might even need to close the browser and re-open to see the update.
The default setting for the CORS policy, and the default behavior of Test Client with regard to whether the message is sent to the proxy or directly to the API endpoint, changes according to the value you specified in the init.js file. The file itself includes inline documentation.
Modifying the custom init.js file
If no customizations were already added in your installation, this file will not exist in your file structure. In that case, you can create the file using the contents below. If the file already exists, you'll need to add the lines of code given below, and then customize as needed.
The code for the default CORS settings for Test Client is shown below. Inline documentation explains the settings you can change. There are two settings:
- allowOverride: true by default. If you change it to false, Test Client will not display the security settings dialog relating to the same origin policy, and therefore developers will not be able to change the setting.
- defaultOption: cmForwardProxy by default, indicating that the message is sent by Test Client to the proxy and then forwarded to the API endpoint. If you change this setting to cors, indicating that the API is expected to support cross-origin resource sharing, the message is sent directly to the API endpoint; the forward proxy is not used.
SOA.Framework.Common.Map.config({
  "testClientSettings" : {
    "policySettings" : {
      "sameOriginPolicy" : {
        // possible values true, false
        // true - will display dialog
        // false - will not display dialog
        // By default this is set to true
        "allowOverride" : true,
        "cors" : {
          // possible values "cors" and "cmForwardProxy"
          // cors - directly access endpoint
          // cmForwardProxy - proxy through Forward Proxy
          // By default this is set to "cmForwardProxy"
          "defaultOption" : "cmForwardProxy"
        }
      }
    }
  }
});
What are the metadata.json and widget_factory.json files, and how do I use them for customization?
If you're performing UI customization tasks, you'll need to modify these files:
- metadata.json: a file that describes the layout of the pages and the corresponding URL for each page. If there is no customization in place yet, metadata.json contains only a single pair of brackets: {}. For an example of customization, see Example 1: Creating a New Static View in Hermosa Theme.
- widget_factory.json: A JSON file that describes the CanJS view corresponding to each widget in metadata.json. If there is no customization in place yet, widget_factory.json contains only a single pair of brackets: {}. For an example of customization, see Example 2: Creating a New Dynamic View with a Controller in Hermosa Theme.
First create the files, and them upload them to the location shown below:
- /resources/theme/{theme_name}/SOA/CM/extensions/metadata.json
- /resources/theme/{theme_name}/SOA/CM/extensions/metadata.json
- /resources/theme/{theme_name}/SOA/CM/extensions/widget_factory.json
To upload the metadata.json and widget_factory.json files to the Community Manager developer portal
- Log in as a Site Admin and go to the Admin section.
- Go to File Manager.
- In the Resources section, click File Manager. The File Manager window opens at the resources folder.
- Go to the /resources/theme/{theme_name}/SOA/CM/extensions directory. If the folder structure isn't there, create each folder in turn, go into it, and then create the next one until you have the structure. Make sure you get the capitalization exactly correct as shown here.
- In the /resources/theme/{theme_name}/SOA/CM/extensions folder, upload metadata.json and widget_factory.json.
- Exit out of File Manager.
How do I upload resources to the Community Manager developer portal?
You can upload platform resources, such as avatars and other images, stylesheets, and custom pages, in the same way that you upload platform content. There is a different button to access the file structure for platform resources.
To upload resources to the platform
- Log in as a Site Admin and go to the Admin section.
- Go to File Manager.
- In the Content section, click File Manager.
- Go to the folder to which you want to upload resources. If you are modifying default platform files for the first time, you'll need to create the folder structure. To do this, go to Customization and choose Generate Customization Files. For more information, see What functions are available to the Site Administrator on the Customization page?
Note: You might get a message that the file exists. This is expected if you are replacing a default platform file. Click OK.


