Using the Timeout Policy
Learn how to configure the timeout for service requests and specify a custom fault error message.
For information about using policies in the context of the Community Manager developer portal, see Business Policies.
Table of Contents
- Introduction
- Timeout Policy Options
- Configuration
- Activating a policy
- Attaching a policy
- Timeout Policy: use case for Policy Manager
Introduction
A Timeout Policy is a Quality of Service (QoS) policy that allows you to configure the timeout for each request and specify a custom fault error message that is returned to the client.
Timeout Policy Options
The policy includes the configuration options listed below.
Timeout Policy Details
- Name: A read-only field that displays the name of the Timeout Policy.
- Description: A read-only field that displays the description of the Timeout Policy.
Timeout
- Timeout Limit: A field display that allows you to specify the timeout limit for a request.
- Fault Message: A field display that allows you to enter the SOAP fault message (<faultString>).
- Fault Element Name: A field display that allows you to enter the SOAP fault element that holds errors and status information for a SOAP message.
- Fault Namespace URI: A field display that allows you to enter the URL that points to the fault code schema.
- Fault Namespace Prefix: A field display that allows you to enter the fault namespace prefix.
Configuration
Let's take a quick walkthrough of the Timeout Policy configuration process to get you started.
Step 1: Add Policy
In Policy Manager, to create a Timeout Policy instance, go to Policies > QoS Policies and choose Add Policy.
Step 2: Modify Policy
When you click Modify to make changes to the Timeout Policy on the Policy Details page, the initial policy looks like this:
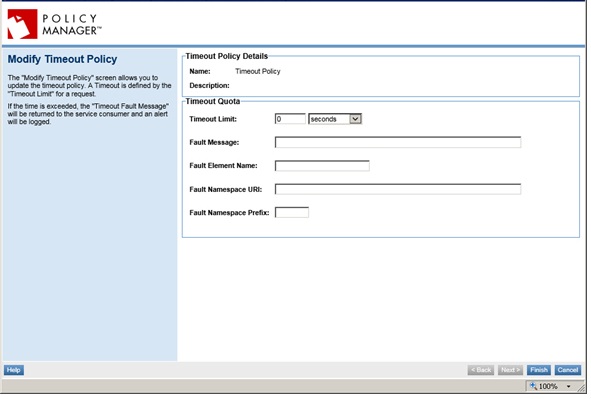
Configure the policy options based on your requirements and click Apply.
Step 3: Activate Policy
When the policy configuration is complete, activate the policy so that you can use it.
Step 4: Attach Policy
After you've saved and activated your policy, you can attach it to a web service, operation, or binding.
Step 5: Test Policy and View Monitoring Data
After you've attached the Timeout Policy to a web service, operation, or binding, send a request to your service and go to the Services > Monitoring section to view the results for Logs, Real Time Charts, and Historical Charts.
Activating a policy
When you create and configure a policy, the policy is in Draft state. When the policy configuration is complete, activate the policy: click Activate Policy and then confirm. See Activate a Policy.
A policy in Draft state is not available for general use. Once you activate the policy, it is in Active state and is available for use.
Attaching a policy
To use the policy, go to the Policies folder in the respective organization and attach the policy to a web service, binding, or binding operation.
Timeout Policy: use case for Policy Manager
This section provides a Policy Manager-specific usage scenario for the Timeout Policy.
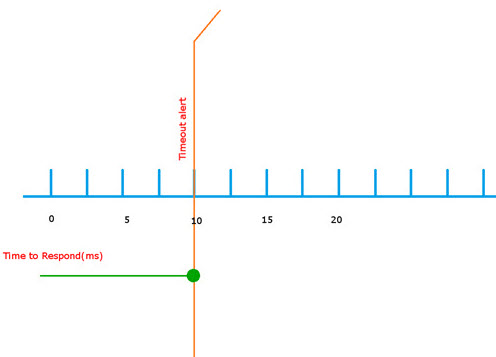
Service Response Timeout / Fault Message
Response provided by a service will timeout if the response time crosses 10 milliseconds. Fault message is sent to the application/client.
- Create two physical services in the Policy Manager Management Console using Create Physical Service.
- Provide service details and finish the wizard.
- Using Virtualize Service, virtualize each physical service and host on Network Director (ND1), and assign a name (for example, Vs1, Vs2).
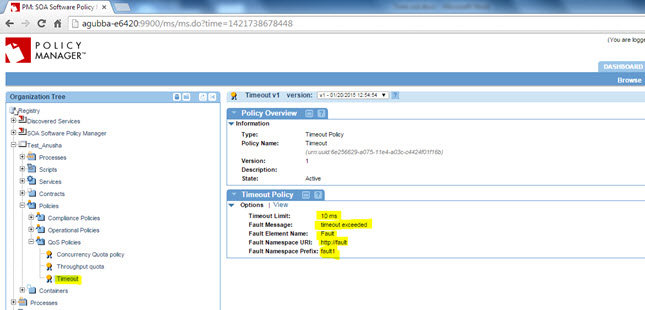
- Navigate to Organization > Policies > QoS Policies and use Add Policy to create a Timeout Policy.
- Configure the Timeout Policy as per the use case with 10 millisecond timeout and a custom Fault message.
- Activate the policy in the Policy Workflow portlet and attach the Timeout Policy to the Vs1 service in the Service Details > Policy Attachments > QoS Policies section.
- Send requests from the application/client to the Vs2 service.
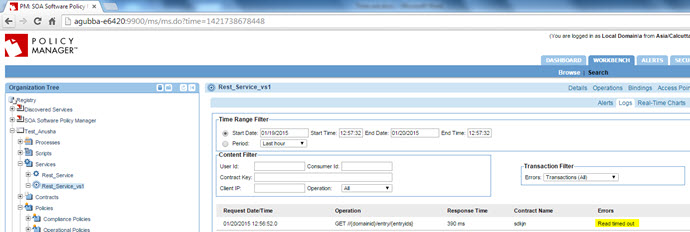
When the response time has been exceeded, the Timeout Fault Message will be returned to the service consumer and an alert will be logged at the service level.
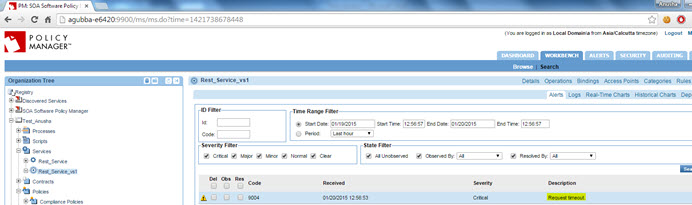
The details in the usage logs show the error being displayed as configured in the policy.
Note: The policy can be attached at the Contract/Organization/Service operation level. The behavior would be the same.
- Timeline: